Learning Targets:
- Use all prior learning; animation tools, principles and techniques collected throughout the course and apply to a character in one shot
- Create your own reference
- Remember the 5 rules to set a key
- Include anticipation in your movements
- Be critical and analyze throughout working, edit and continuously make improvements
OVERVIEW: In the final stage of animation basics you should pull together all the animation tools, principles, and technique you’ve collected throughout the workshop and apply them to a character animation shot! Of course, you’ll also learn you a few more new ideas, tools and techniques to add to your tool kit. By the end of this session, you will have taken a leap into the next level of your character animation using a simple one-legged rig.
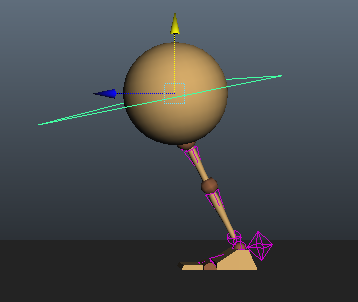
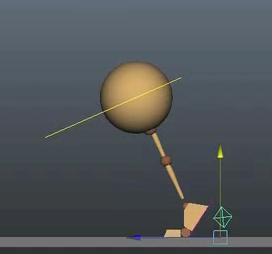
| oneleg.ma |
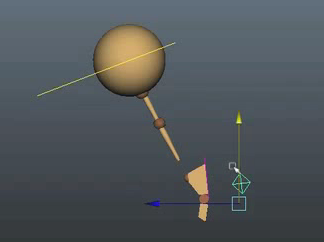
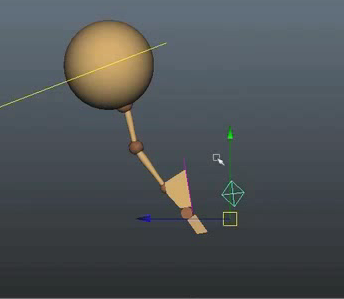
FK (Forward Kinematics) versus IK (Inverse Kinematics).
IK Controls
Chain = A series of parents linked together
IK Controls
Chain = A series of parents linked together
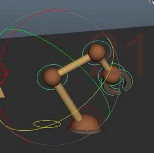
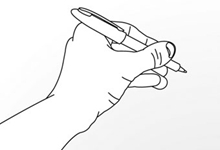
So instead of controlling movement by rotating joints like in the robot arm (FKArm)
You can controls from the end, for example a hand picking up something – what else moves when you go to pick up a pen?
You can controls from the end, for example a hand picking up something – what else moves when you go to pick up a pen?
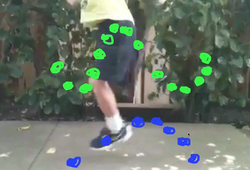
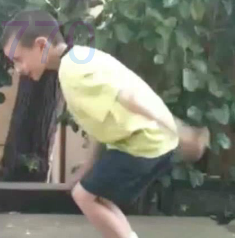
This week we’ll make a leg hop! - You need to find a reference to start
reference
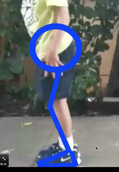
Make your own two-legged jump with a friend!
1. Record a video of it. 2. Freeze a snapshot the video at regular intervals. 3. Then draw on the hopping leg |
|
what to look for
|
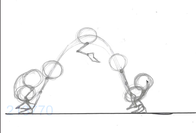
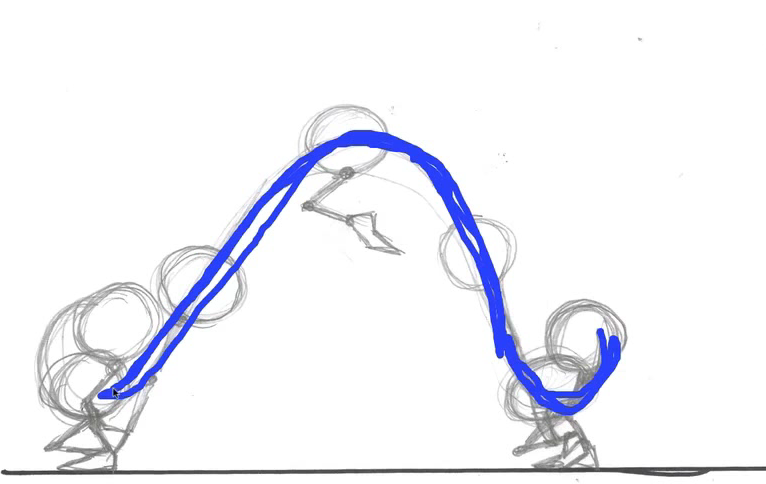
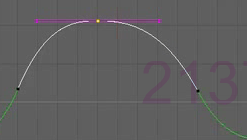
Arcs
1. Notice how the upper part of the body counter balances as the legs bend and the hips go back. This is to balance the weight 2. Watch the hips; they swoop down first and then go up sharply before slowly coming down. 3. Look at the feet, they too have an arc. But which part of the foot should you follow? 4. Always follow the part where the energy is initiated from, in the case the heel. See you the position of the foot changes as the heels move. Landing with heels and toes later. See how it looks when it’s tracked See the speed and the path of action Draw the Path of Action onto your reference drawing |
|
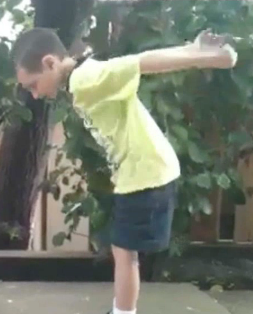
anticipation
A signal to the audience, and it can be quite subtle, that’s there a big change in movement coming up. It’s where the character prepares for the main movement.
In the jump this might be the arms coming up behind or the lowering of the entire body.
In the jump this might be the arms coming up behind or the lowering of the entire body.
|
|
scene set-up review
Use what you have learnt in previous lesson to set up your shot by yourself.
--Include ground plane
--Animation preferences: tangent types --shot length --Visibility Mask - turn off show joints Optional: --visibility layers --Create a shelf with MEL buttons set up movement
Let’s use different types of work flows in this demonstration
3. Turn off weighted tangents in animation preference, try clamped and weighted tangents this time 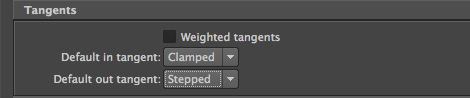
Look at your drawing, how many main poses do you have? Around 7 main?
5. Then bring into anticipation. You may want to add a little rotation to bring the knee joint up since where using a FK joint 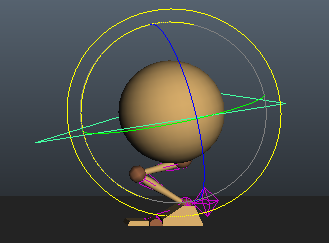
7. Go back to the 2nd pose and only select the foot, not middle mouse button drag to the 3rd pose and key all. Then bring the heel up to meet the leg. Key
8. Carry on like this until you have all 7. 9. Next you can move your keys into th correct places in the time line as before. 10. Now you’ll convert the curves by selecting all an opening graph editor. Select all curves and change to flat tangents 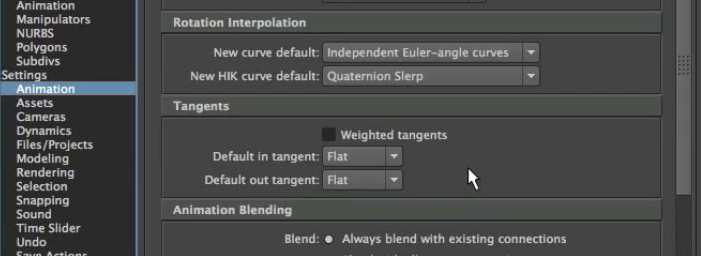
|
staging
1.Keep it simple, use orthographic view from the side
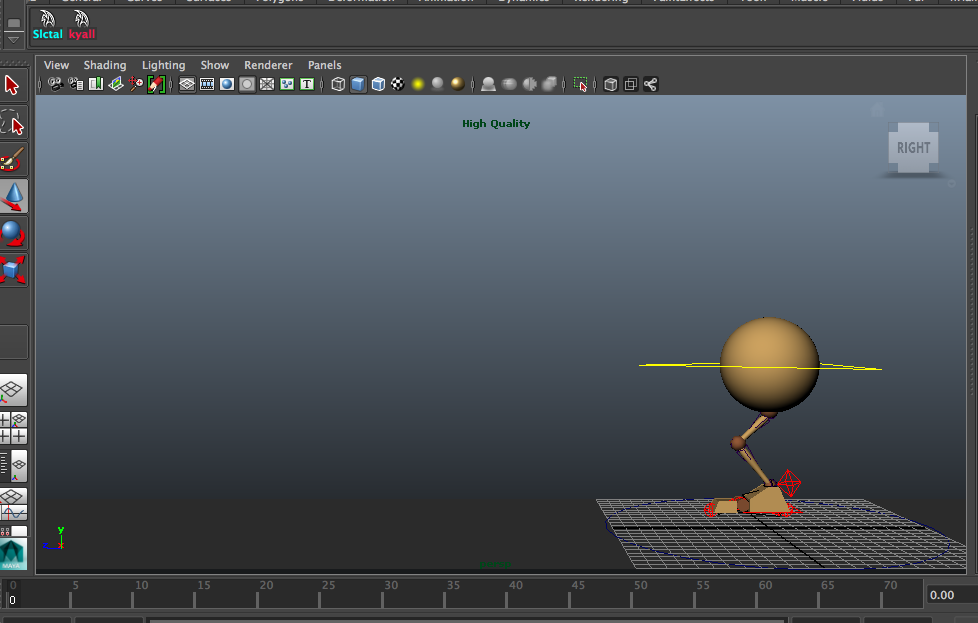
2. Lock your camera: view > select camera. Go to channel box, select all and right click > lock selected
5 rules to set a key
- when the character starts moving or any part - when the character stops moving - when the body part changes direction - when the character starts touching something - when the character stops touching something Start to key in the poses, don’t worry about where in the time line yet.
4. Save in the starting pose 6. Send it up, and to the left, you shouldn’t worry about the foot
11. Now turn off auto key
12. In animation preferences change your tangent types to flat. Everything you do now will be flat. 13. Now copy pairs. Shift your times up and put holds in where you need to. You can also change your timing again if you want to. For example your landing should be short and the main jump where the leg is aerial should be much longer 14. Clean up your tangents 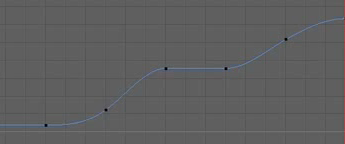
|
Layering: starting with the base-the ball
|
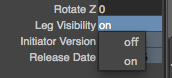
1. turn off the leg by select the large control circle at the bottom. Go to the channel box and see the leg – turn off visibility
3. You can make it more extreme at the sides
5. Do the same thing for the X axis
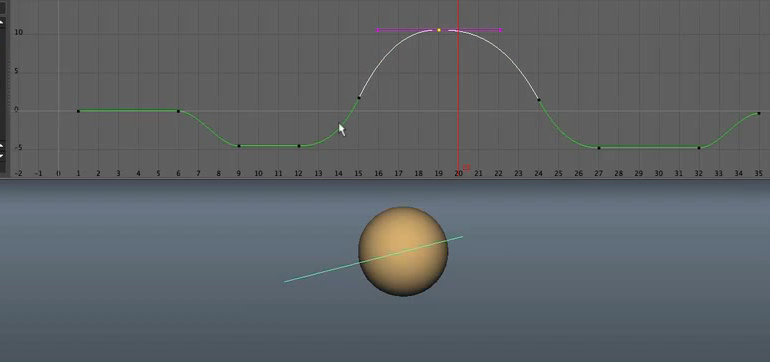
Part of the problem might be the rotation. Think about where the ball faces as it works. Right now it’s stays the same. What happens in the middle? 6. Try changing the x rotations to level out. Look at the arms in your reference if you need to. Add keys, move keys. |
2. Let’s edit the ball head as if it were the bouncing ball. Choose the Y Axis. Do you see how the curve is flat where the ball hangs too long in space. Add an extra key in the middle here then delete the two tangents around the edge
4. Add some slow-ins and slow-outs to your tangent curves
|
add the leg back
Once you’re happy, turn your legs back on. You might see a problem with the leg. Middle mouse button drag and key on each pose.
Now play it through, what can you see that still needs work? Why does it need work? How can you fix it?
Now play it through, what can you see that still needs work? Why does it need work? How can you fix it?
Go into your key poses and edit from there. Perhaps you’ll need to move the ball forwards or back along Z axis to get the weight correct
an example of working straight ahead
Consider that foot. Let’s get the push off right. You can just edit the frame by frame by now
|
|
|
See the big push off and a large gap between the leg and foot. Bring it up and push it back
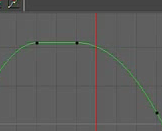
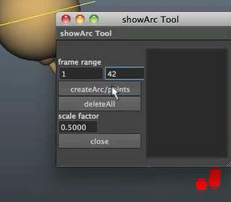
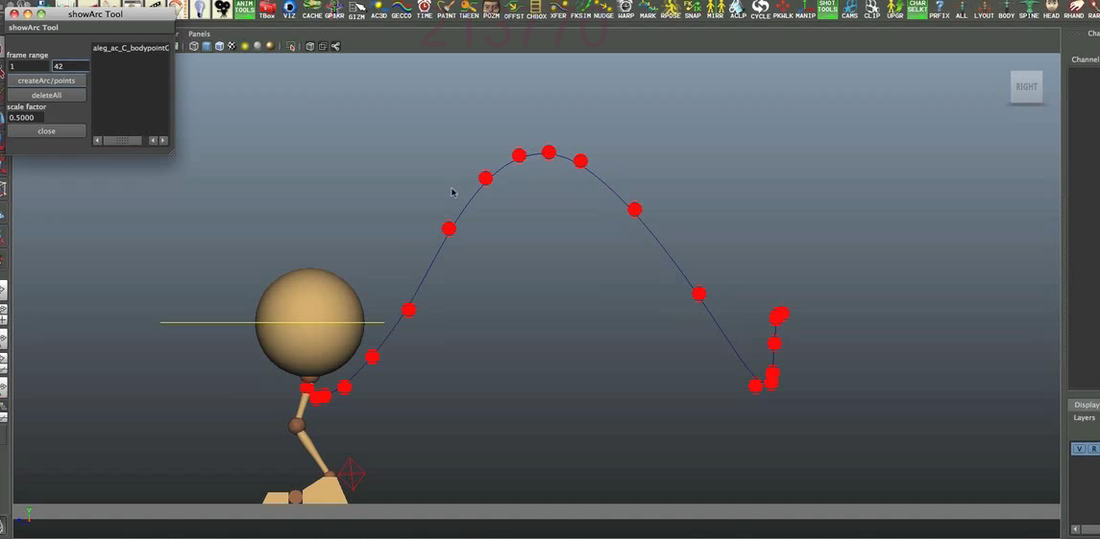
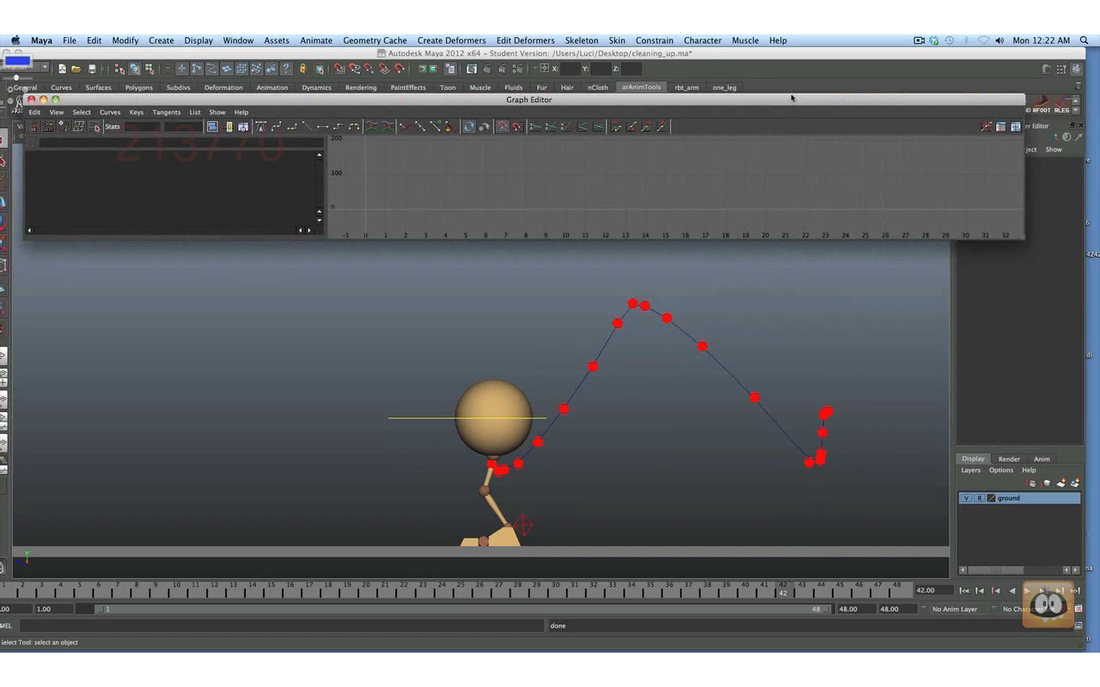
checking your arcs
1. There is a great tool for this. In the tool bar look for ArAnimTools and on the left click the curve tool

|
2. Click the curve you want to control – the ball one - The tool box will appear
4. Maybe that’s not the curve you wanted, looking at the graph editor curves, they don’t always correlate so you will have to do some more changes
6. Next track your foot arc, is it correct? It may get confusing with the multiple dots going on. You can select them in the outliner. And turn them on and off in channel box
|
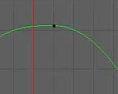
3. click ok and you should see this
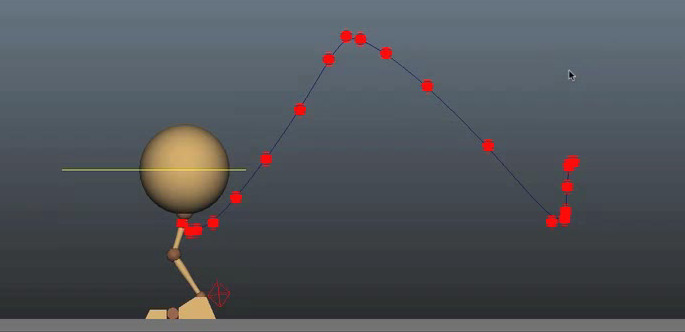
5. Edit away until you get make you want – should be like this
|
polish
--Do the main poses read? Check the main poses are they still there?
-- Is the character still balancing?
-- do the arcs read?
-- check the knees?
-- Is it too smooth? Have you go rid of the character in the work?
-- Has someone given you feedback? Get peoples feed back and get them to tell you if it feels right. Anyone!
-- Is there pixel lock?
Go through slowly and check there’s no frames where nothing is moving
.EXERCISE: Download the “One Leg” character rig and add a hop using the methods discussed.
• Shot length: 2-3 seconds in length.
• Rig: One Leg character rig.
• Camera Note: Camera should be locked off in a side orthographic view.
• Schedule: Uploaded one day prior to your next lesson.
• Session A: shot should be taken through blocking.
• Session B: Shot should be taken to final!
• Submit both your Maya and movie file.
• Create a .ZIP archive that contains both files:
• Name the Maya file “YourNickname_Step.ma”.
• Name the Rendered file “Yournickname_Step.mov”
• Go to your Google drive folder and upload the .ZIP file to the Assignment Session section. The file should be uploaded one day prior to your next session.
