What is texture and surface?
Learning Targets:
- summarize what a texture or surface is, why it's important and explain when it should be applied
- summarize what a texture or surface is, why it's important and explain when it should be applied
Adding a texture and surface give a look and feel to your object. Is it smooth? shinny? Is it transparent? reflect? Rough and has a bumpy texture?
Shading is the next step after modeling!
Shading is the next step after modeling!
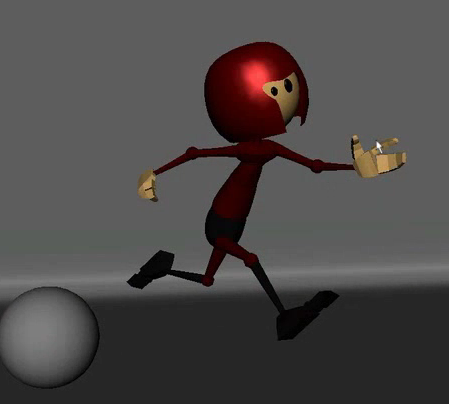
In this 3D Model of Magnito, what kind of texture does he have? Where are the shaders? (different textures)
Answers: He has many shinny surfaces; on his helmet; his hands; black shoes and pants, he even has shinning eyes.
Why is important to shade and texture objects?
Answer: Grey is the default color in Maya, like the ball above. You can't see it well against the grey background. A different color and texture will make your animation far more dynamic!
Setting up the screen for rendering
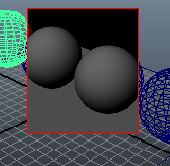
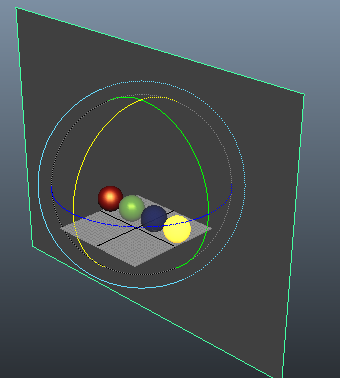
Exercise: Use your knowledge so far to quickly create a floor surface with 4 polygon spheres in a line on top. Create a layer for your floor and edit the layer so it's locked.

Learning Targets:
- Know shortcuts to turn on and off lighting and shading
- Arrange your workspace to use the rendering effects whilst applying to surfaces easily
- Experiment Transparency, Ambient Color, Incandescent, Mapping, Diffuse, Translucence to create as different effects as possible
- Create 4 different shaders and apply to 4 surfaces
Rendering = adding the texture and shade
|
These boxes will show the different s of your screen, with/without texture, lighting, wire frame etc..

|
KEY BOARD SHORT CUTS
4 = wire frame 5 = smooth shade all 6 = wire frame over smooth shade 7 = Texture 8 = Use all lights 9 = |
hypershade
When creating shaders you create a network =
A collection of rendering knodes that define how colors and textures contribute to the final look of the surface.
A collection of rendering knodes that define how colors and textures contribute to the final look of the surface.
|
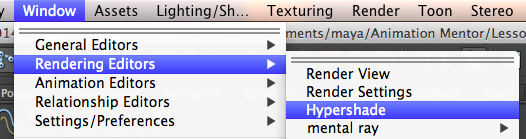
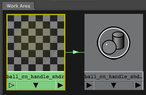
1. Go Window > Rendering Editors > Hypershade
2. Select a surface and select in put and out put connectors...

...which will bring up this in the work area...
|
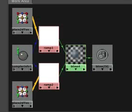
Here you can see lot of options:
-left you can create new shaders, -right you will see shaders already in the scene -bottom right is work area 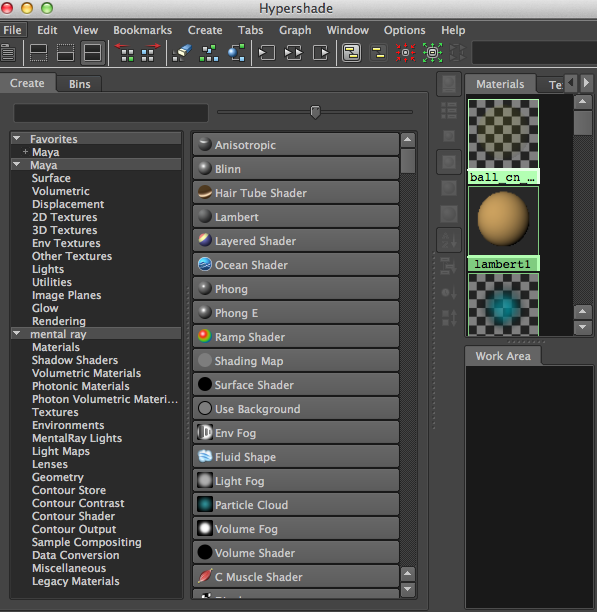
...with something more complicated it could look like this. The selected surface is in green and you can see the action that make it, connecting to it.
|
Setting up the view
|
3. Also Open up Render view.
Window > Rendering Editors > Renderview Arrange the windows like this, filling your screen 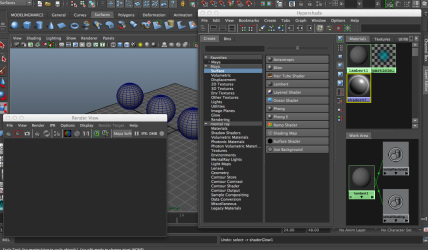
5. Now you should have 3 boxes arranges like this..
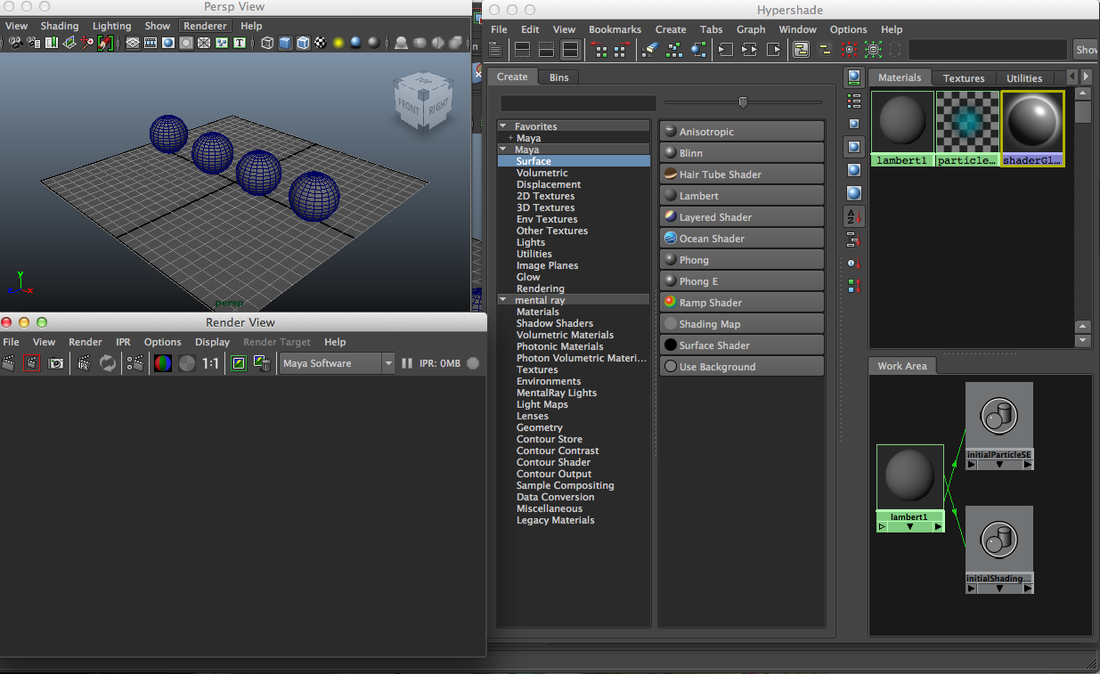
7. Finally arrange them to look like this
|
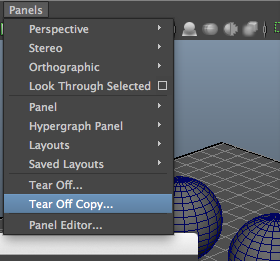
4. Back in the main view. Panels > Tear-off copy
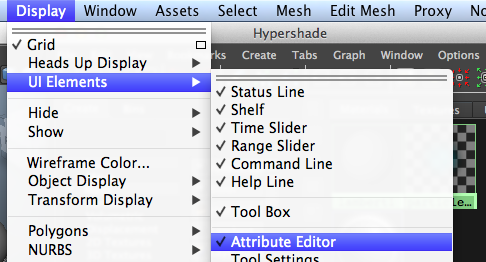
6. OPen up attribute editor
|
applying surface
|
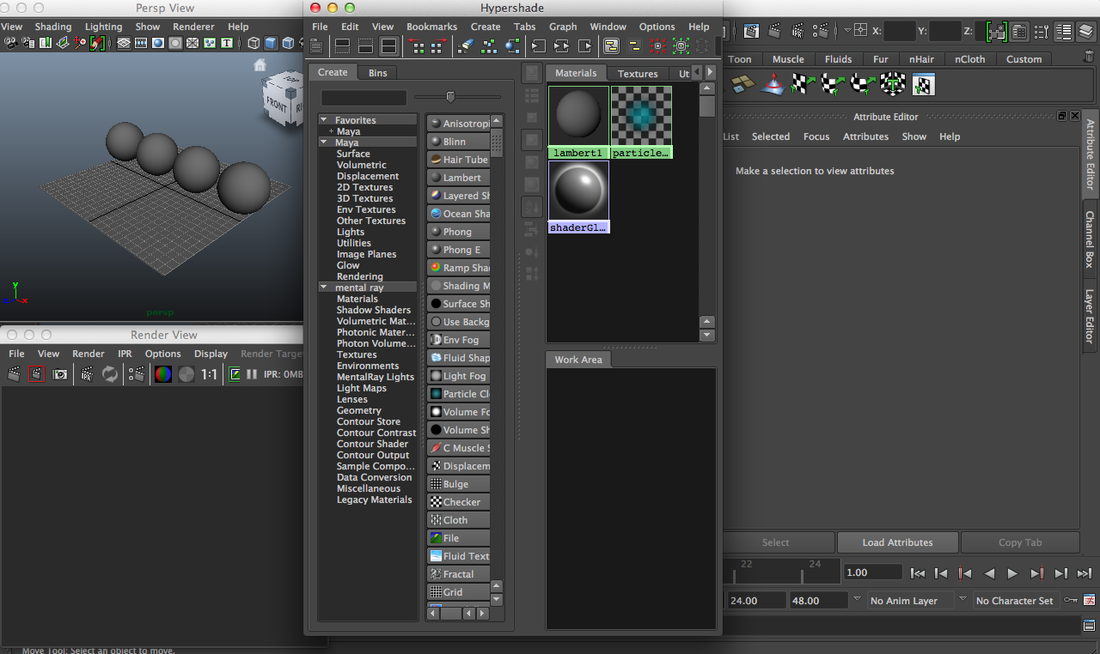
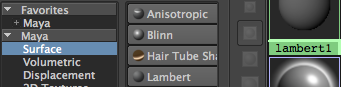
8. Lambert is a good surface to start with. It's Matt not shinny
11. You'll see those checked areas near color choice. Here we can apply more knodes, link images, more textures...
12. Below you have:
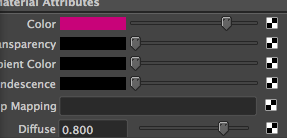
Transparency : makes the object see through (opaque) Ambient Color : More/less bright Incandescent: Adds white to lighten the object Play with these bars to see for yourself. If you were making a light bulb then you would add lots of white here Mapping: Adds a rough surface. You won't be able to see it until after you've rendered. Diffuse: How much light is reflected off the surface. higher value = more light coming back at you lower value = more light absorbed into the surface. Translucence = Image the sun is shinning through a leaf and you see the silhouettes of it's veins..well that's what this does. 14. When you happy you can apply it to your shape
Select object first. Right click over your Knobe and Assign to material selection |
9. But let's try Blinn. Click on it and it will add to your work space. Now rename it!

10. Below that in the Attribute Editor you'll see change color. Click on that and choose a color
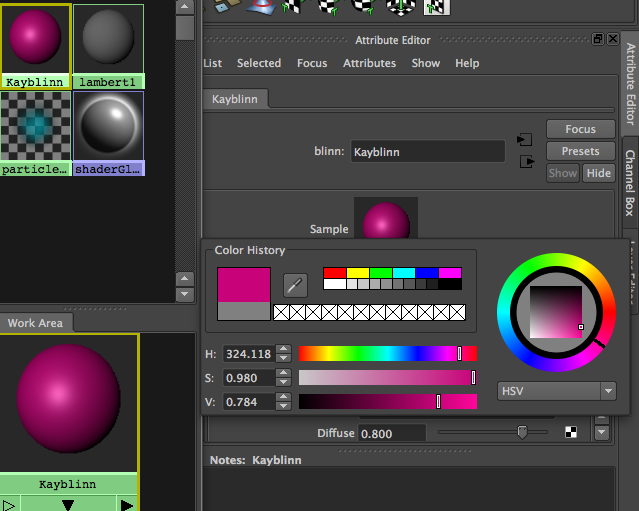
13. Because we choose Blinn, Below those options you have Specular Shading.
That's the shinning highlight that we're editing now. 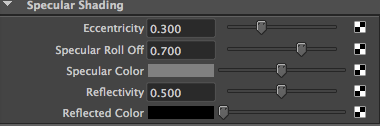
Eccentricity : How big that highlight it
Specular color : Imagine you were shinning a yellow light onto your object you you had shinny red car paint 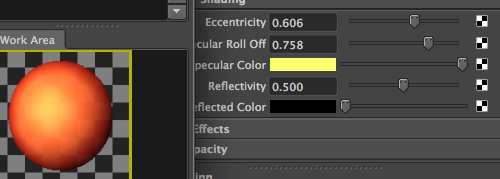
|
test renders
Learning Targets: - Know the different buttons in the Render Box
- Take photos and save them as jpgs
- Explain to a peer how you created one texture
- Take photos and save them as jpgs
- Explain to a peer how you created one texture
1. IN the render Box you'll see some options
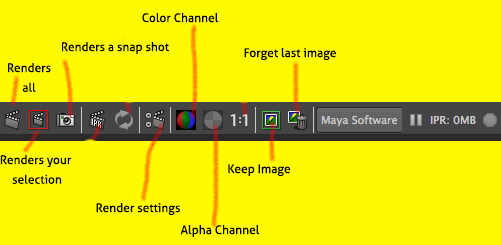
|
Snap Shot is good if your making a big scene and you want to focus on 1 part
|
Keep Image: Will save your settings. You can choose a different surface or play with the settings, Render again and you'll see a slider appear at the bottom...
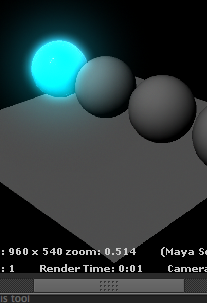
...You can slide between them to compare
|
assigning material
|
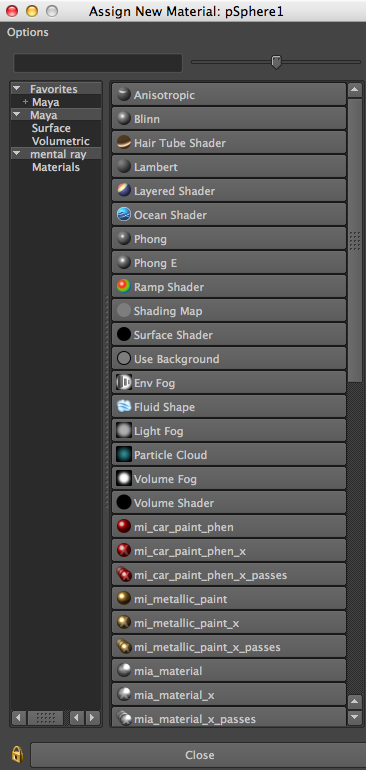
1. You can also right click hold on your object and assign new material in the drop down menu. This box will appear.
making a light bulb
1. Choose a Lambert. A yellow color, add some ambient with another yellow color incandescence

2. Special Effects you can increase the glow.

3. Check your progress in by rendering
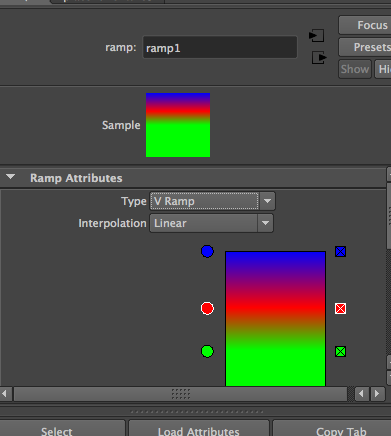
Creating a sky
1. Create a Polygon Primitive plane and scale it up to fill your background and rotate to 90 degrees
4. You see the gradient is automatically set to red, green and blue. You can play with the drop down menu to see direction of the gradient and chance the placement of the change in color by moving the dots next to the bar
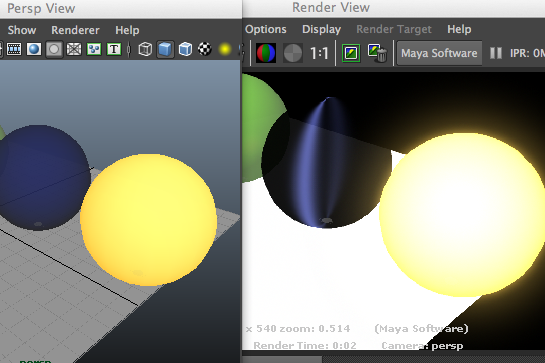
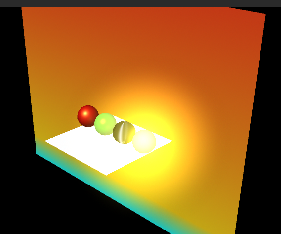
See how the light bulb surface acts as the sun!
helpful glass surface
|
2. Really useful is to assign existing material in that drop down menu. Here you can pick from what you've already created. Now you'll be really happy that you've named all your knobes!
Apply two more surfaces to you spheres. Render regularly to get a true idea of what it looks like 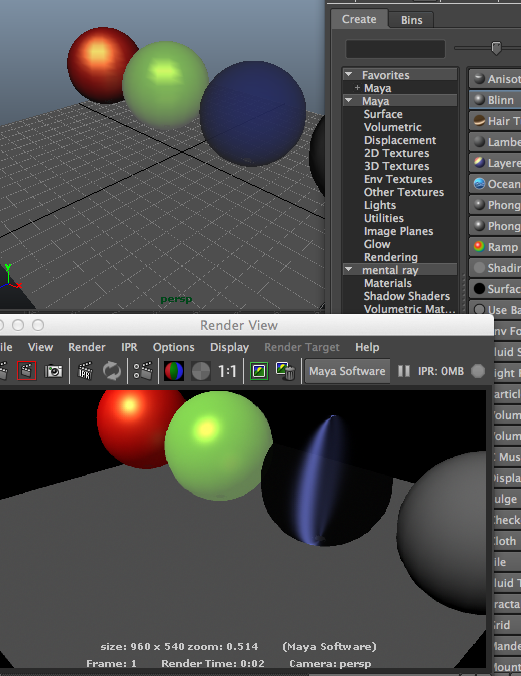
Learning targets:
- Create a glass surface - Create a mirrored surface - Create a light bulb - Create a sky making a mirrored surface
a glass surface
TIP: It's good to have your cameras set up and check your view through the camera. You sky should fill the view,
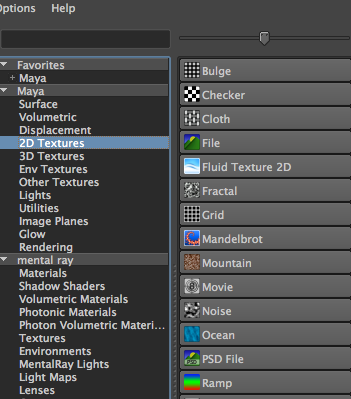
2. Make a Lambert and in the channel editor, next to selective color, hit the checkered box and you'll access to Create a render node option 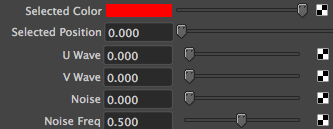
3. Select 2D surfaces and Ramp
5. Change the colors and remove inputs by clicking on the X boxes on the right of that gradient bar. Try making a sunset, a blue sky, night time city glow...
|
a) exercise : Apply a glass, mirror, light bulb surfaces and then add a background. Your background should be reflected in shinny surfaces. Render the screen and upload a jpg to the correct google drive file.
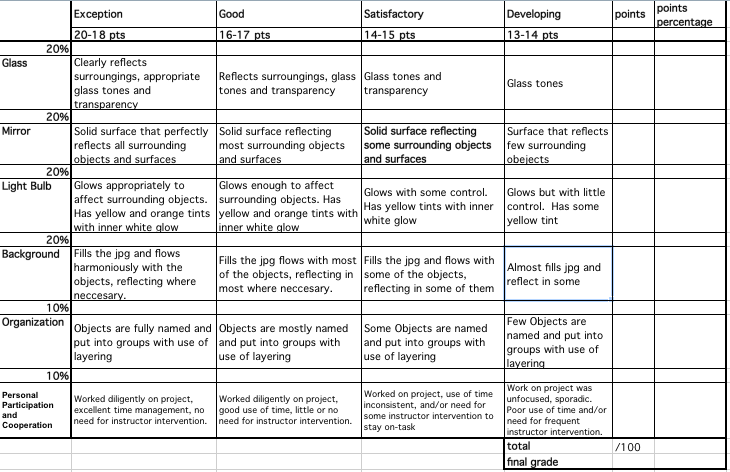
EXERCISE: Apply basic shaders on your ball and set. Create a simple render (you can use default lights for this exercise, we’ll get into lighting next week). Keep in mind the concepts of readability and center of interest. For example, don’t place a bright red object at the edge of your scene unless you want to draw the viewers eye to it. Be intentional!
- Create a .ZIP archive that contains both files:
- Name the Maya file “YourNickName_Shading.ma”.
- Name the Rendered file “YourNickName_Shading.jpg”
- Name the Maya file “YourNickName_Shading.ma”.
