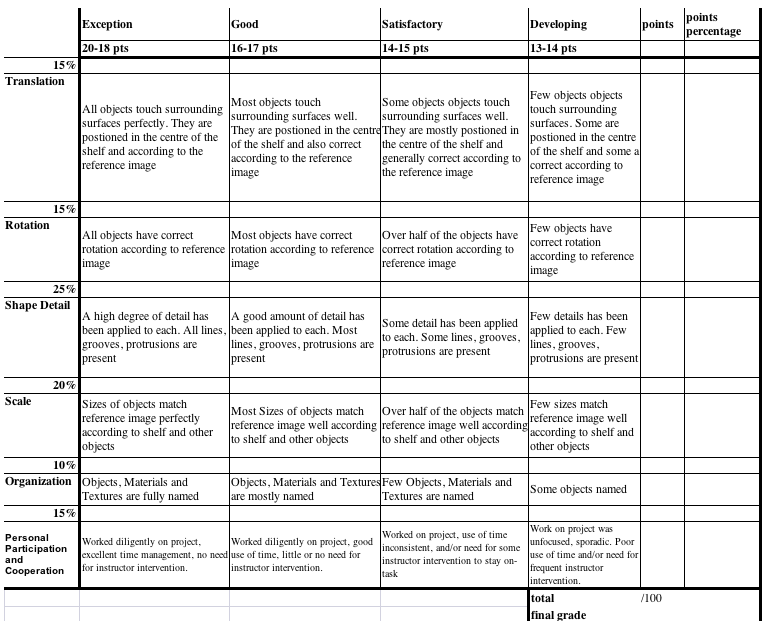
Learning Targets: - Use primitives to create to manipulate a circle
Learning to create a range of objects
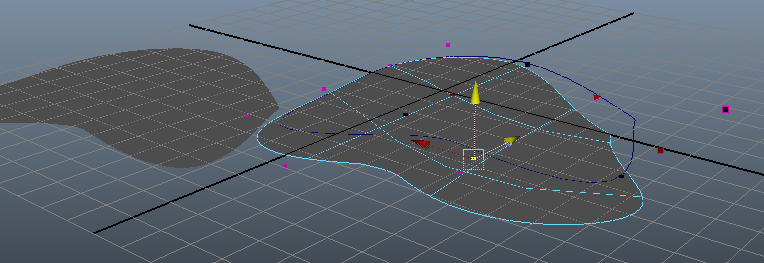
Primitives Modeling vs drawing circles
NURBS and polygons are great to create with but can be a little restrictive.
A few Tips and Tricks before we begin..
NURBS and polygons are great to create with but can be a little restrictive.
A few Tips and Tricks before we begin..
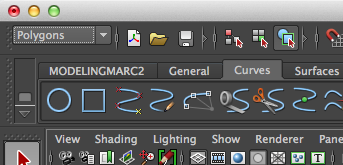
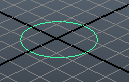
1. Check your in curves, hit the curves tab and select the circle tool. Draw your circle in the middle...
See how when you select control vertex (CV), the move 'W' you can edit the shape.
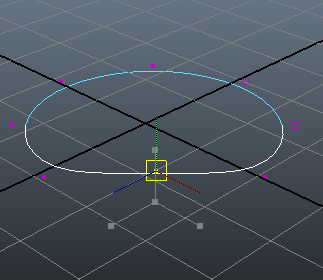
4 Click around in a circle and you'll see how it goes and hit enter when your done.

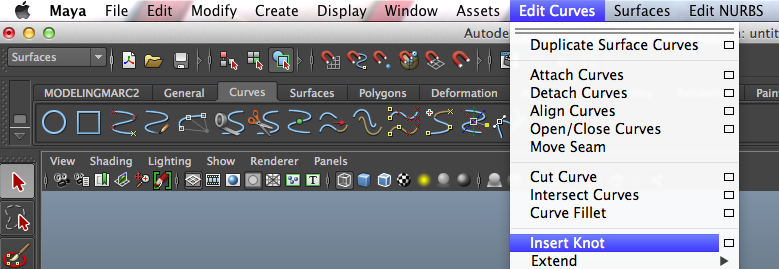
6. You can close the circle nicely by edit curves> open/close curves
|
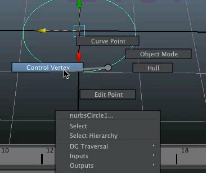
2. select your circle and right click hold you'll see this menu and let's look at the 'end point' and 'control vertex'
3. OK, go back to your circle shape (control Z undo).
Now, create > CV curve tool 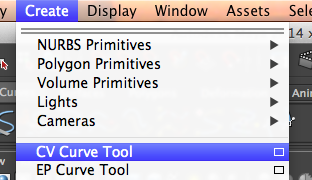
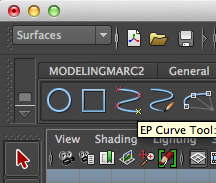
5. Now repeat but use the 'EP Curve Tool' to create the circle.
When you right click select control vertex on the object you see how you can edit the points and it will move the line 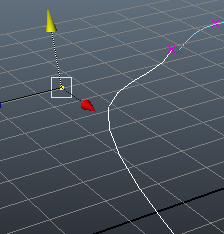
|
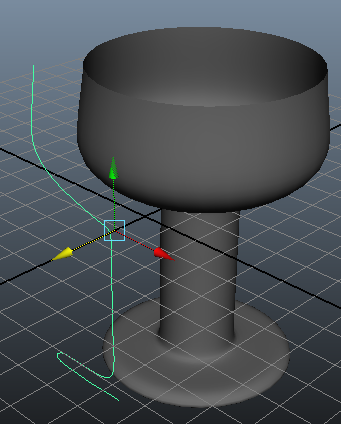
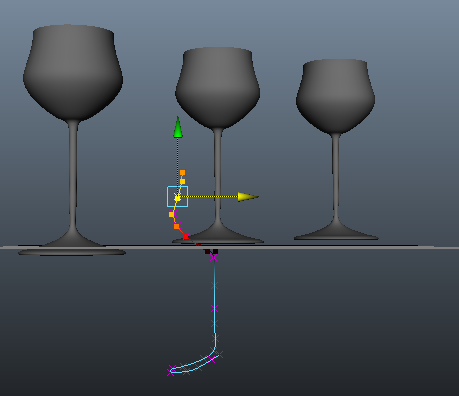
Drawing a glass: REVOLVE surface
Learning Target:
- Use EP Curve tool tool draw the edge of a shape of your choice and then revolve the line to create a completed shape
- Review the shape and make changes to the line as desired
- Use EP Curve tool tool draw the edge of a shape of your choice and then revolve the line to create a completed shape
- Review the shape and make changes to the line as desired
Here's a great demonstration for modeling anything that is circular. The example gives a wine glass but you could make a vase, coke can, flower pot, a pen, bottle...
|
1. Start with a nice blank canvas and check you've selected the curves menu. Put your screen to side view. Choose the create EP curve tool.
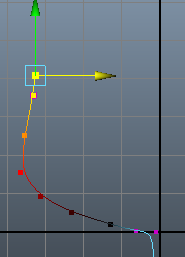
3. Right click > control vertex and now you can use the move tool 'w' to move the points to create a perfect shape.
5. Go back to perspective view and you'll see how that looks. If you move that solid object away the curve is left behind. You can move the curve by itself and you'll make the object thicker/thinner
7. Once you are happy with the shape it's a good idea to delete the history. That floating line can be a pain. select object.
Edit > delete by type > history Now when you edit the curve nothing will happen 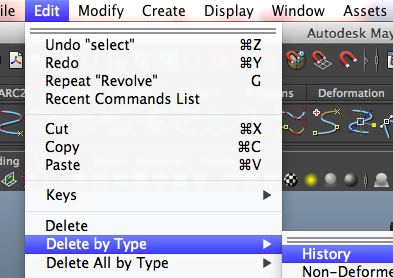
9. If you're creating multiple object, it's a really good idea to name them. Do that in the channel box

|
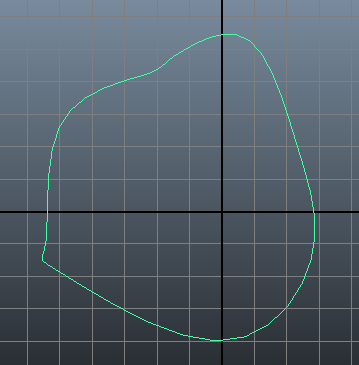
2. Start to draw a basic wine glass shape but only half of it. Doesn't need to be perfect, you'll see how to edit.
Hit enter to finish and it will turn green 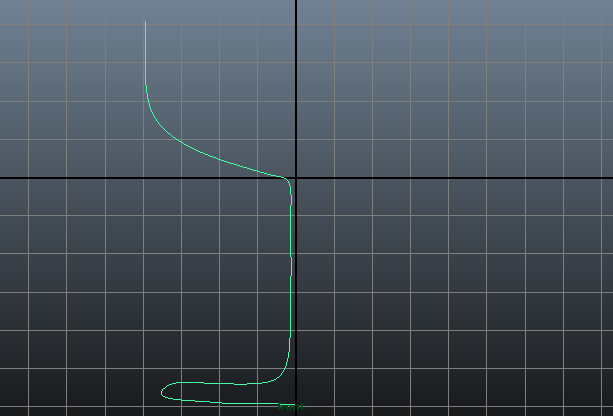
4, Right click > object mode. Select the curve.
surface > revolve. This revolves the line 360 degees making a solid object. Press 5 and you'll make it solid 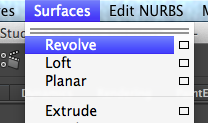
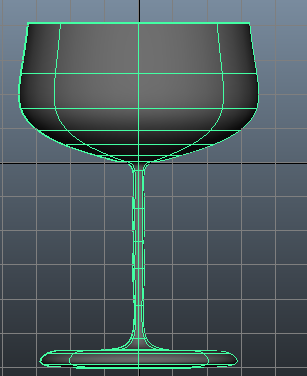
6. You can still see edit the curve now. right click > control vertex > chose a point > 'w'
8. Also you can use this curve to create more glasses. You can repeat the same revolve action.
|
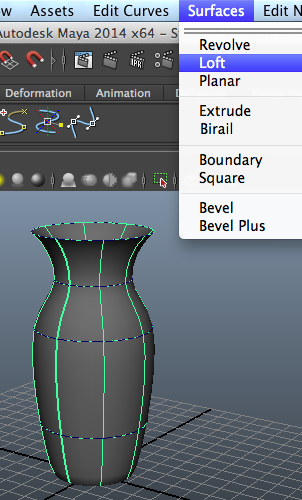
modeling a vase: LOFT
Learning Target:
- Model a Vase or similar object by using the Loft Tool
- Review and Edit as desired
- Use the same circles to create different shaped vases
- Model a Vase or similar object by using the Loft Tool
- Review and Edit as desired
- Use the same circles to create different shaped vases
A loft will create a skin or a cross section around surfaces
|
1. Create a circle with the circle tool and along the y axis duplicate 'control D'
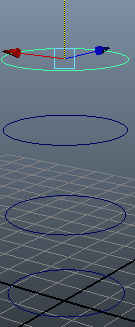
3. Select all surfaces, then surfaces > loft
|
2. You can change the scale of some 'r'

4. Now you can do the same as with the revolve. Move your object to the side and you can edit the circles
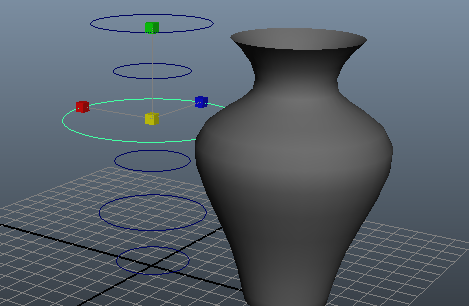
5. As with before, if you select the object Edit > delete by type > history
Now when you edit the curve nothing will happen and you can make different shapes 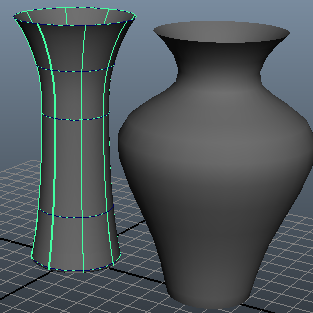
|
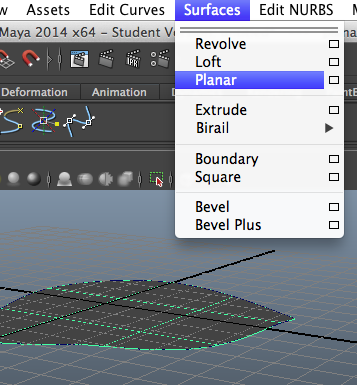
making a floor : planar surface
Learning Targets:
- Use the EP Curve Tool to create a planar surface and place it as a wall, floor and ceiling
- Bend a planar surface to create either a flag, make 3 or 4 leaves or the panel of a car
- Make recommendation to a friend about how to improve
- Use the EP Curve Tool to create a planar surface and place it as a wall, floor and ceiling
- Bend a planar surface to create either a flag, make 3 or 4 leaves or the panel of a car
- Make recommendation to a friend about how to improve
Actually your making a plane or surface area. It's useful for creating the ground your objects can sit on. You may also want to create walls and ceilings in this way.
|
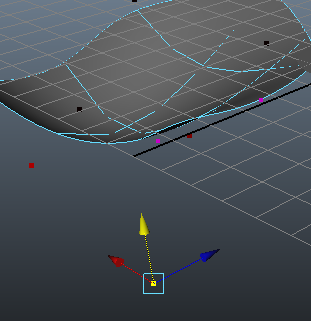
1. Select the top view for this task and choose the 'EP Curve Tool'. Draw a shape and join it up with edit curves> open/close curves.
3. You can edit your control vertex, right click >control vertex, along the x and z axis but if you try to move up and down along the y axis you'll see the planar dispersal.
5. Click back on the original shape and now you will be able to edit the shape in any direction
|
2. Back in perspective view, surfaces > planar
4. As with the others, move your object away from it's shape. 'control D' will duplicate and edit curves> open/close curves will allow you to create different ones.
With this you could make panels of a car, the surface of a leaf, a flag...the possibilities are endless.
|
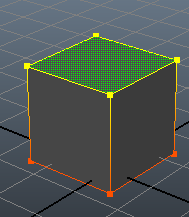
polygon modeling tools
Learning Targets:
- Experiment extruding surfaces from a polygon primitive cube and make the strangest shape imaginable
- Experiment extruding surfaces from a polygon primitive cube and make the strangest shape imaginable
EXTRUDE SURFACE
It's a good idea to start with a primitive object and then add on details.
It's a good idea to start with a primitive object and then add on details.
|
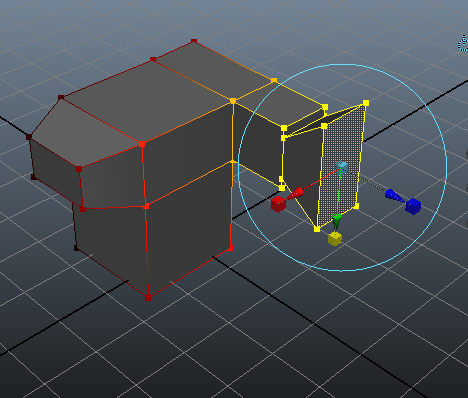
1. Start with a polygon cube. right click > surfaces and select the top surface
3. By the using the arrows to move the surface of the boxes to scale you can begin to create crazy shapes
|
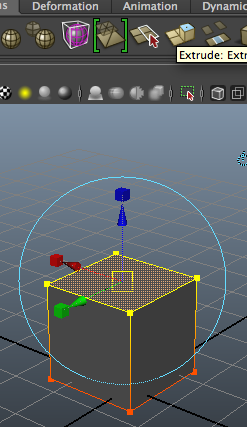
2. Find the extrude tool. should look like this
|
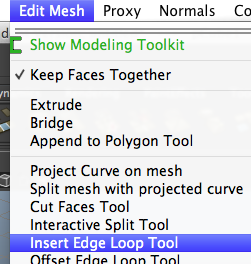
EDIT MESH LOOP
Learning Target:
- Use the edit loop tool to smooth the edges of a polygon cube
- Use the edit loop tool to smooth the edges of a polygon cube
|
1. Start with your cube again. Edit mesh > insert edit loop tool
|
2. Left click on a surface and hold down on an edge. This will split your shape
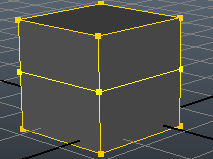
3. You can add the vertically and horizontally...
Hit 3 and it will become smooth. You can go back and get putting in these lines at anytime 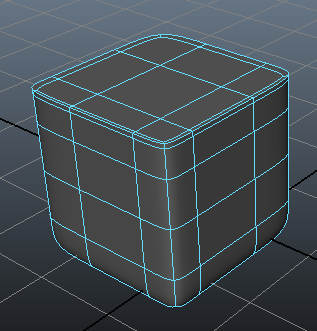
|
using polygons to make a wine glass
Learning Target: - Use a photo or a real wine glass to model a 3D version and use polygon primitives to create it making it as accurate as possible
With anything, there's many different ways to do the same thing. So let's create a wine glass using what we've just learned.
|
1. Create a Polygon cylinder.
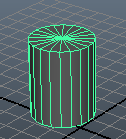
3. Right click > face, Extrude and scale it down
5. Extrude bring it out
7. Extrude go in to give the glass a thickness
8. Extrude down to make it hollow. Bring it right down to the bottom as much as you can without going all the way through. Try to make it as real as possible.
10. Let's imagine you need to keep editing and make it wider in the middle. We'll add another subdivision in the center. Edit mesh > insert edge loop tool. Click and drag on an edge to place
|
2. You can edit this in the channel box to these settings. Go to INPUTS
height - 0.3 radius - 2.5 Subdivision caps - 0 (that's those little pie shapes on top) Turning it into one face will make it easier to extrude 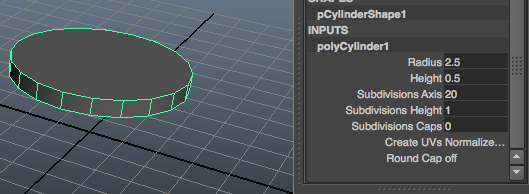
This will act at the bottom of the wine glass
4. Extrude again and bring it up. 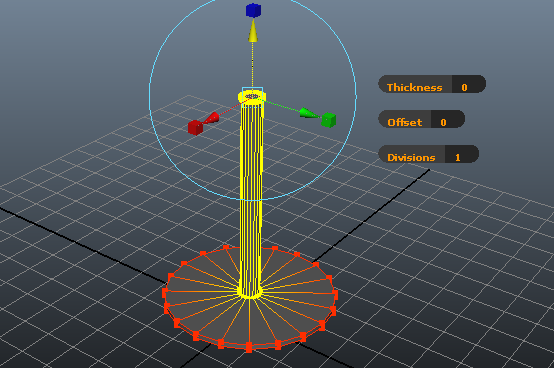
6. Extrude to bring it up

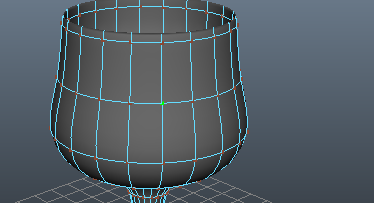
9. Select the entire object and hit '3' to smooth and it's finished.

11. You can then edit this line with scale 'r' or move 'w'
|
Exercise:
Send a jpg file of each of your creations. You will be marked on detail and accuracy.
Put the jpegs into one folder and compress the file
Save the file in google drive and call it 'nickname_modelingbasics'
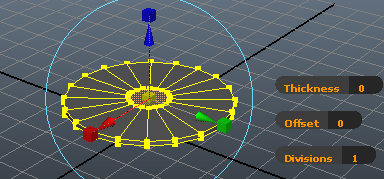
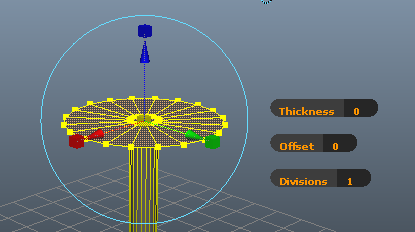
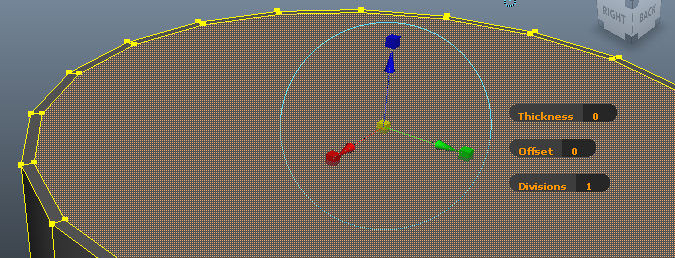
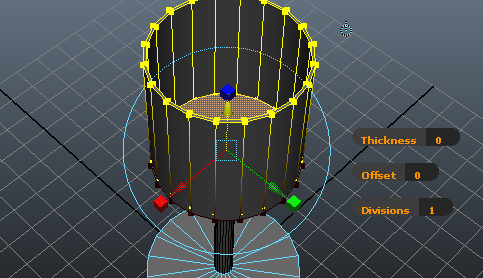
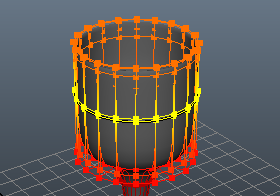
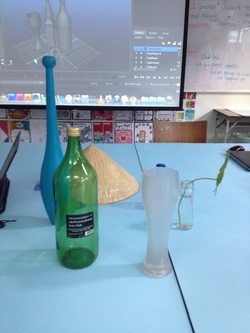
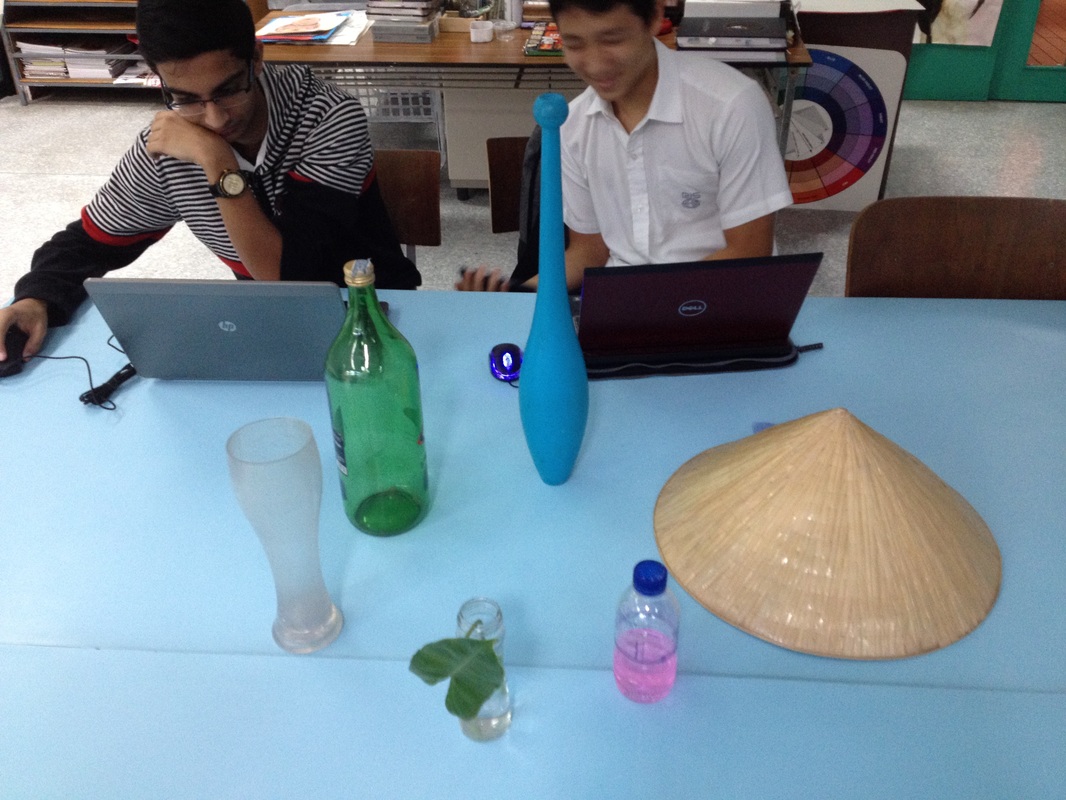
Exercise: recreate this construction, using the skills you have learned in the previous exercise. These pictures are the same but from different angles. No matter which angle you look at your assignment it should match either picture.
Send a jpg file of each of your creations. You will be marked on detail and accuracy.
Put the jpegs into one folder and compress the file
Save the file in google drive and call it 'nickname_modelingbasics'
Exercise: recreate this construction, using the skills you have learned in the previous exercise. These pictures are the same but from different angles. No matter which angle you look at your assignment it should match either picture.

|


|