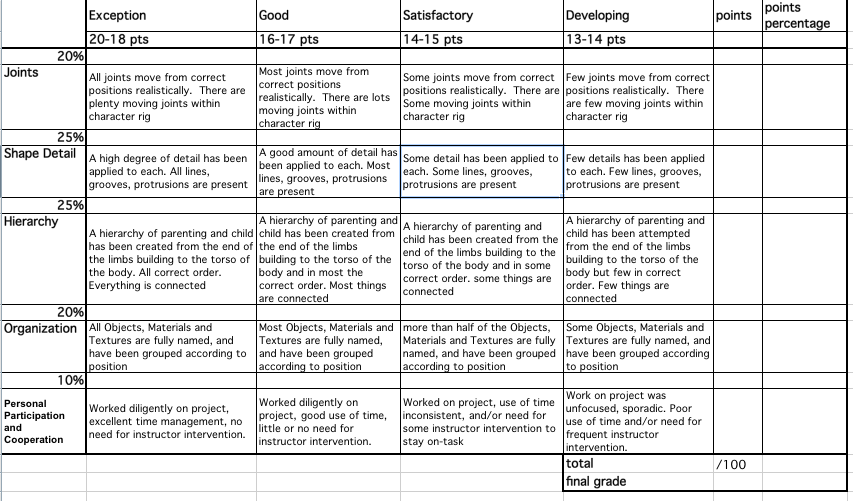
Learning Targets:
- Design your down 2D Robot character
- Use Polygon Primitives to model your robot
- Provide feedback to the group about how you have achieved this
- Design your down 2D Robot character
- Use Polygon Primitives to model your robot
- Provide feedback to the group about how you have achieved this
Hierarchies:
OVERVIEW:
Building a simple character using polygon primitives will add to your basic knowledge of modeling with some new tools and tips on incorporating hierarchies. Most importantly: we’ll be going over setting up hierarchies and parenting... essential concepts for understanding how a character rig operates and how to use solid workflow practices accordingly with your animation.
Building a simple character using polygon primitives will add to your basic knowledge of modeling with some new tools and tips on incorporating hierarchies. Most importantly: we’ll be going over setting up hierarchies and parenting... essential concepts for understanding how a character rig operates and how to use solid workflow practices accordingly with your animation.
creating a simple rig
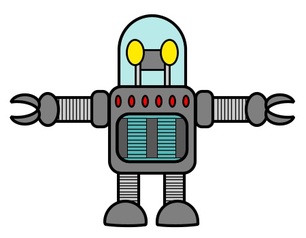
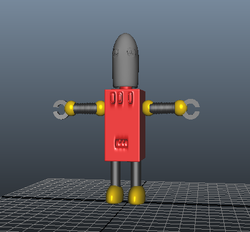
1. First you’ll need find a image of a robot that you like – a flat 2d robot from the front, you may like to draw one yourself!
3. You can scale it as much as you want and sit it on the x axis
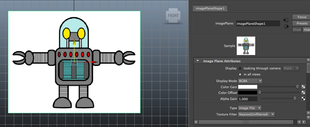
TIP: Control A will open Attribute Editor and you can be more precise with your placement of the image. Your Robot will be created on center so move your image slightly over.
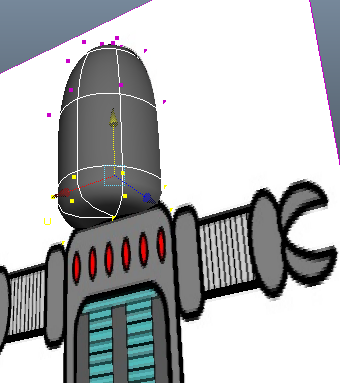
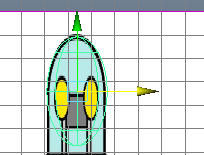
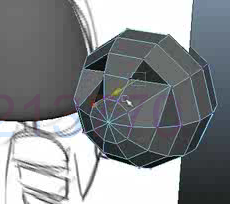
6. Press ‘5’ to fill the sphere. Right click Hold > control vertex. The image will show you how it looks in perspective view
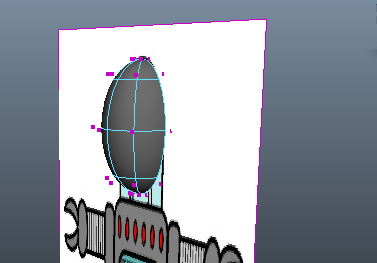
Try looking from different angles to see if it fits.
ALTERNATIVELY
4. Create POLYGON > primitive > Turn-off interactive creation 5. then POLYGON > primitive > sphere 6. In the Channel box > inputs you can change the number of lines you have 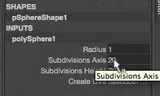
The more you have the more vertex and faces you’ll have. The less you have the less smooth it will be. (low Poly Mode)
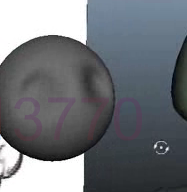
8. Press ‘3’ and you’ll see that smoothed out.
9. Now go ahead and make the all the parts of you machine. For where there is a joint it should have a new polygon or sphere. Remember you can extrude parts too. The more details you can make the better.
TIP: don’t make two legs, just duplicate one 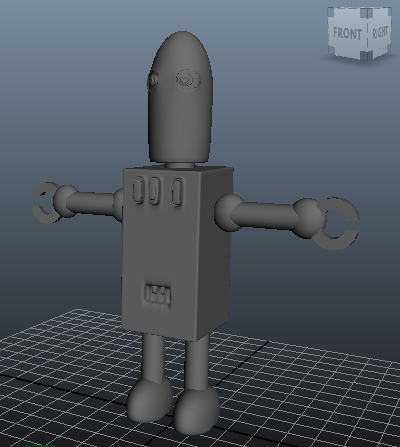
|
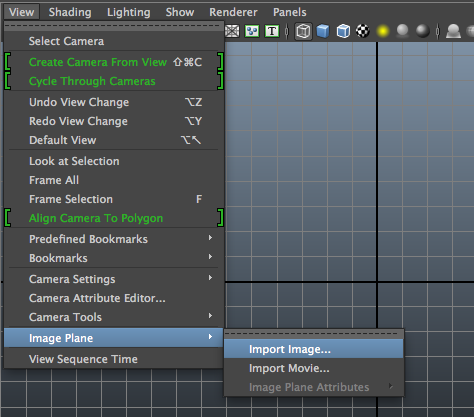
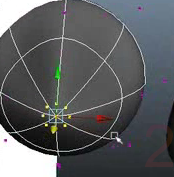
2. In Maya you can file > image plane > import image
4. Start with the head. Create > POLYGONS Primitives > Turn-off interactive creation
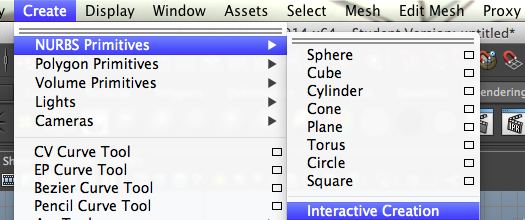
5. Create > POLYgons primitive > Sphere. Move over your image and scale until about the right shape and size
7. Back in orthographic front view you can start to manipulate the vertex. Try selecting multiple vertex at a time and manipulating using the middle yellow box. Or you can manipulate along the x or y plane only.
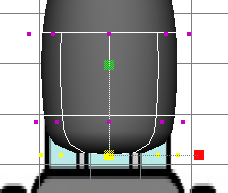
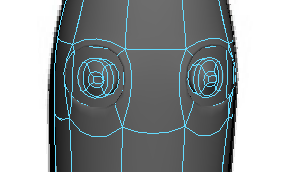
8. If you want to start to push in and pull out the head to make eye sockets or a nose, you can rotate the polygon sphere to 90 degrees and you’ll see there’s more vertex to manipulate
----------------------------------------------------------------------------
7. Try moving 2 vertex in. Hold shift to select multiple
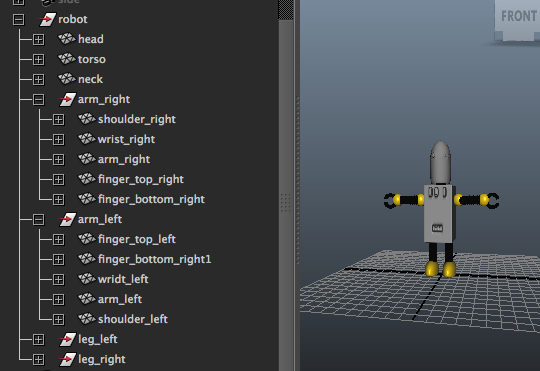
10. Name all your body parts (head, neck, torso…)
11. Assign materials, nodes and shaders to your robot and make sure you name those too
12. Now we’re going to group objects. Select objects that can be group together Edit> group
|
|
|
|
turning a model into a rig
Learning Targets:
- Use parenting to create a hierarchy
-Turn your robot into a rig buy inserting and grouping arcs
- Use parenting to create a hierarchy
-Turn your robot into a rig buy inserting and grouping arcs
This means that you will have the power to animate it
|
1. select a group – the arm – Edit > ungroup
Creating hierarchies They are essential when animating multiple parts. We need to pay close attention to joints – what is joined to what because that’s where movement takes place.
Parenting = When something belongs to something else. It parents a child.
4. Hold down ‘D’ and you can move the pivot point. Think about where exactly you want your joint to move from.
5. Go to quad view Shift F will focus from all angles on your hand.
Here you can check you have the pivot exactly as you expected and edit if you wish. 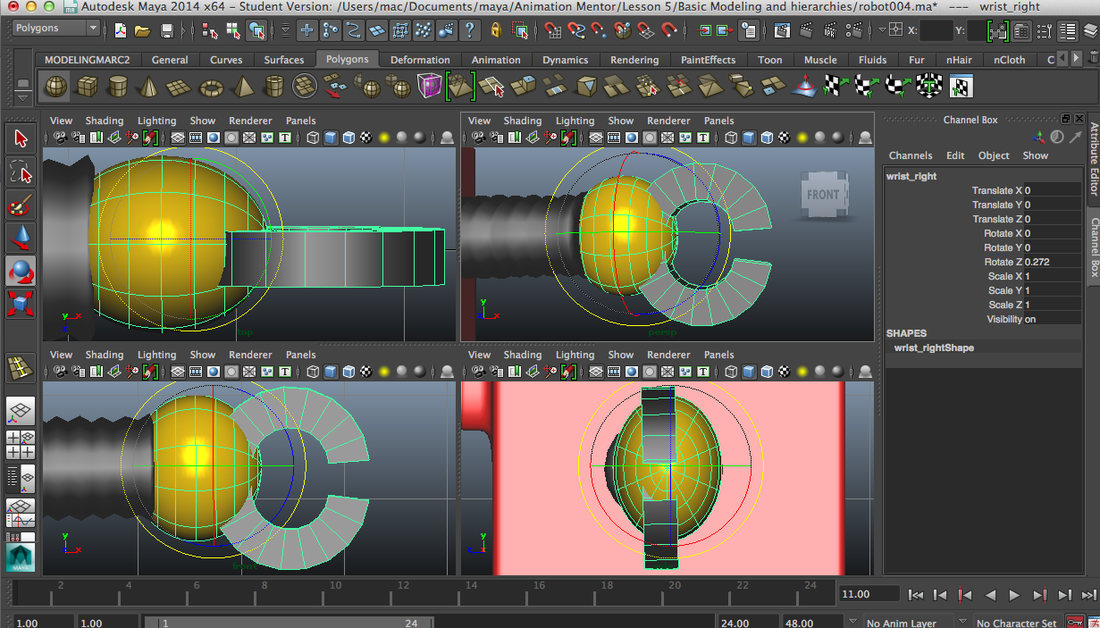
6. Go ahead and move your pivot for all your joints. And parent and child .
|
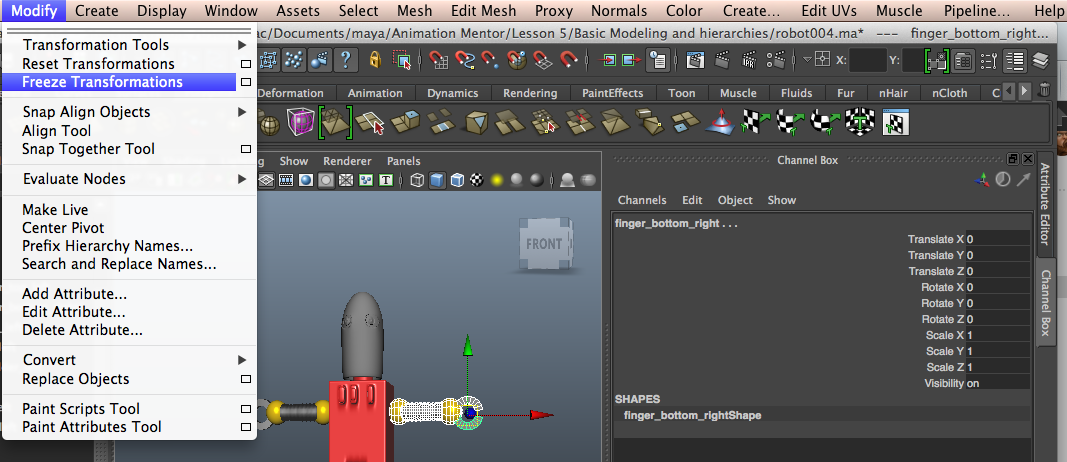
2. Select all these objects again modify > freeze transformations. Notice how the channel box gas been rest to 0
3. select the fingers only > hold shift and select the hand > press P
You can see when you select the hand that the fingers are selected as well. See how when you rotate that everything is rotated together. 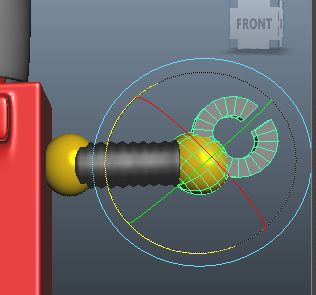
|
animating from a curve
|
1. Normally, when you animate, you animate from a curve so let’s see how to do that. Create > NURBS Circle
see how it’s created at the origin. 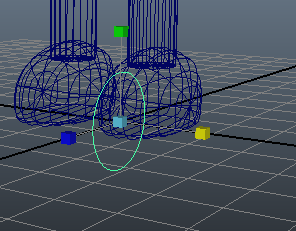
3. Now decide a joint to animate, perhaps the lower arm. Shift >Select it.
4. Go to the mel script at the bottom of the page and type:
Parent-r-s 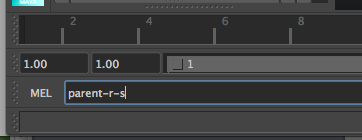
|
2 Rotate it 90 degrees along the X axis and then freeze transformations
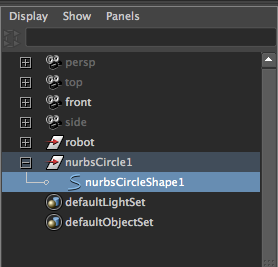
3. Look in the geometry box, select your circle and select the Nurbs Circle shape
|
EXERCISE: Create a simple character using polygon primitives. Use a nurbs sphere to sculpt a basic face; nose, eye sockets, etc. Finally, set up the hierarchy for basic “parented objects;” i.e. Upper Arm/Elbow/Wrist, Upper Leg/Knee/Foot, Hips/ Stomach/Chest, etc.
• Remember to keep it simple!
• Save this file and name it “YourFullName_Hierarchy.ma”.
• Create a .ZIP archive that contains the Maya file.
• Go to your Submit Your Work page and upload the .ZIP file to the Assignment Session on google drive. The file should be uploaded one day prior to your next session.