Learning Targets: - Understand and explain the important of observing
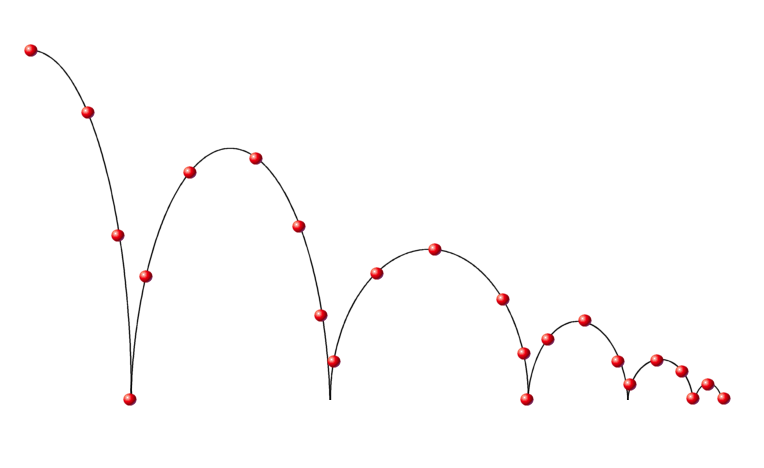
- - Summarize how a ball moves as it bounces
- - Summarize how a ball moves as it bounces
Knowing the principles and physics
A bouncing ball really is a science and physics theory. How high you drop it, the angle from which it comes and the material form which it's made. These rules can be applied to creature that you are animating.
Understanding a bouncing ball will be really useful for anything else later
Understanding a bouncing ball will be really useful for anything else later
WORK FLOW
Work flow = a progression of steps you take to create an animated shot
You'll need to develop strategies for making an efficient process that achieves the correct results. There are different workflows for:
-different kinds of shots
-different movements
-different characters
-different animators (you and how you like to do it)
However normally the first part of anyones, at any-times, workflow is observation!
observation - looking
|
Watch it really happens
|
setting up the shot
Learning Target: - Successfully set up a shot for an animation
analyze the heights the ball reaches at each bounce
- Set keys as the ball moves at different heights along only the y axis
analyze the heights the ball reaches at each bounce
- Set keys as the ball moves at different heights along only the y axis
|
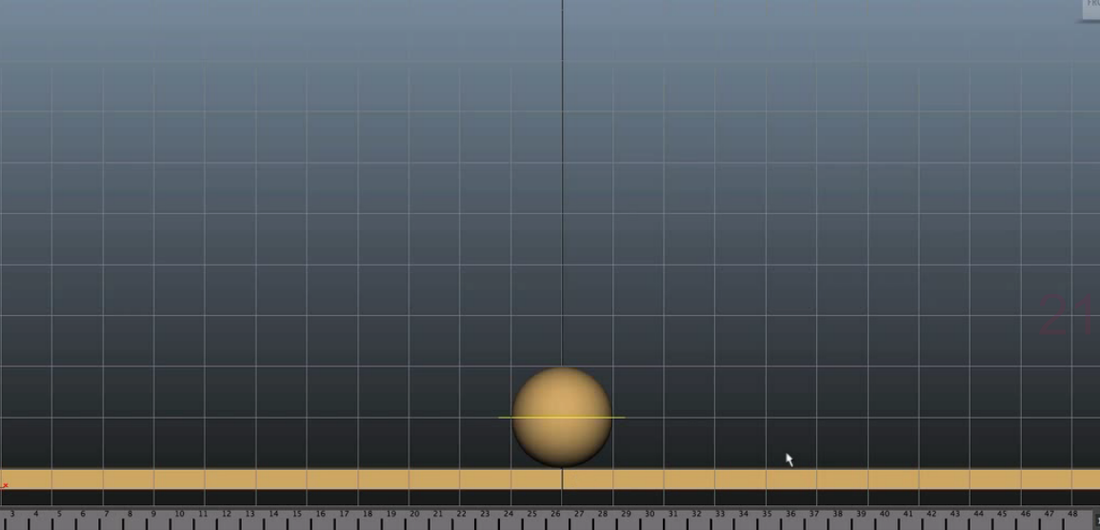
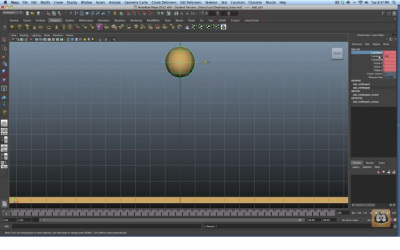
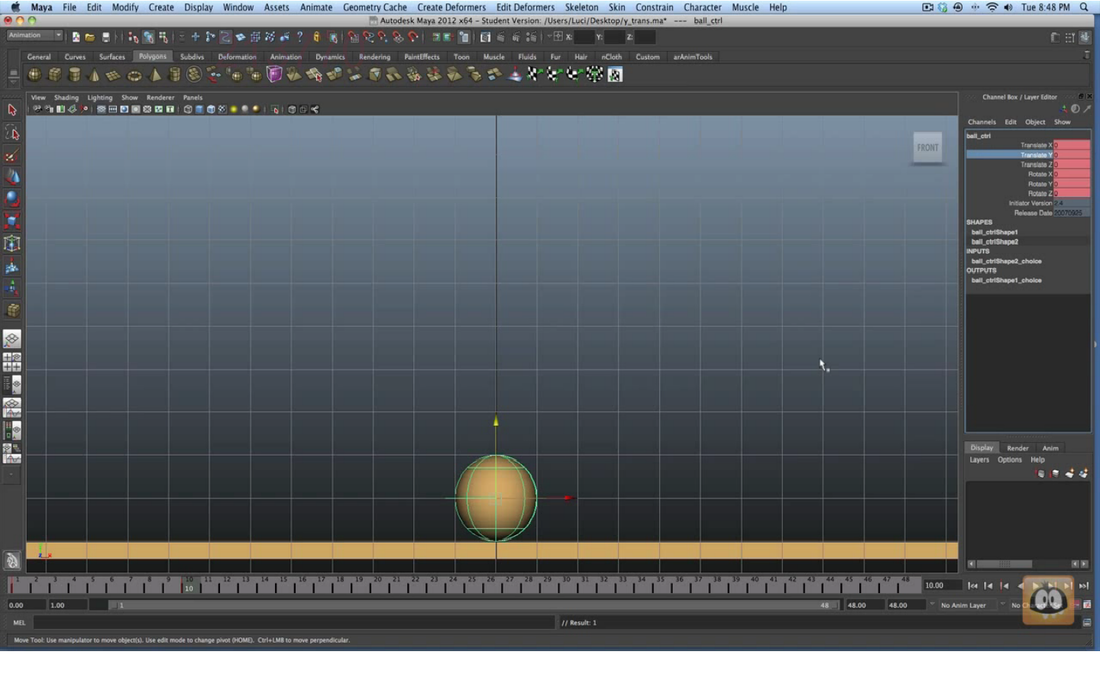
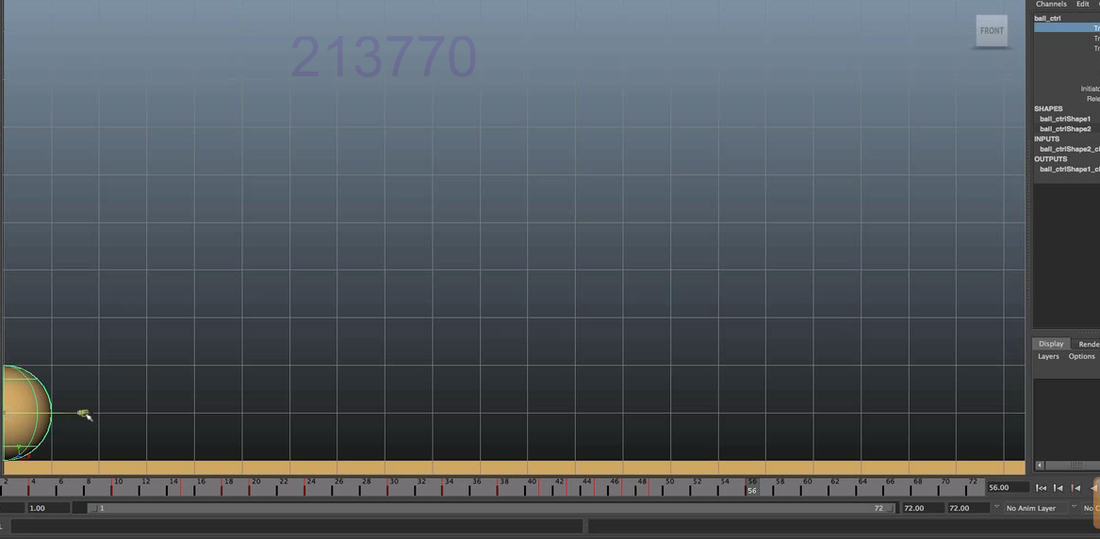
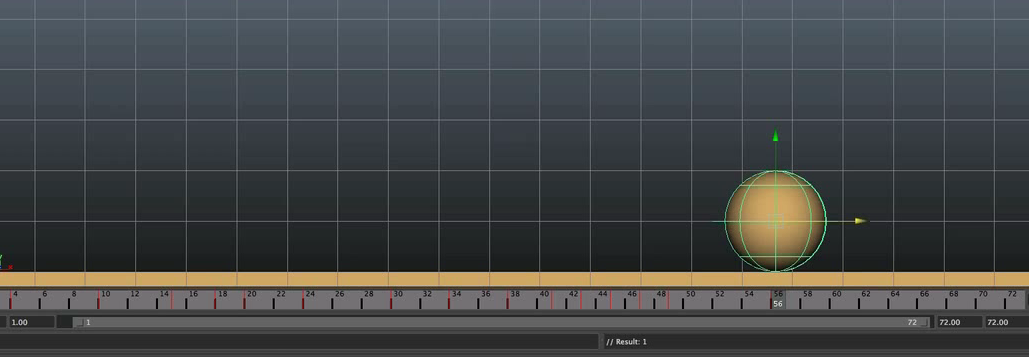
1. Download the simple ball and open in Maya and view from orthographic view, like on the right
Keep it simple and only bounce the along two axis
2. Your ball will need a ground plate to bounce on. So start by putting in that and give it a very basic surface
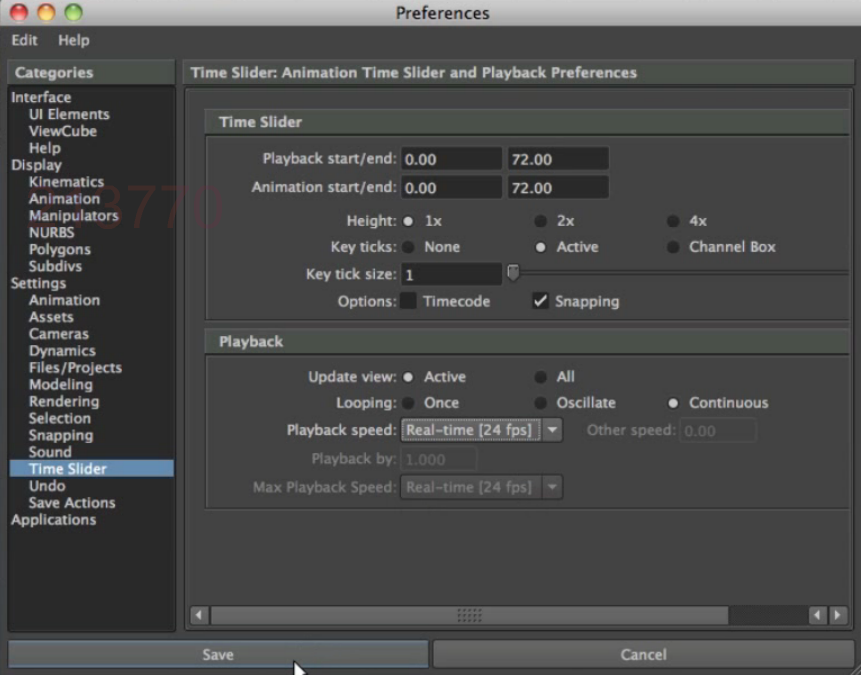
4. Set playback to end at 72 frames and playback speed at real time 24 frames a second
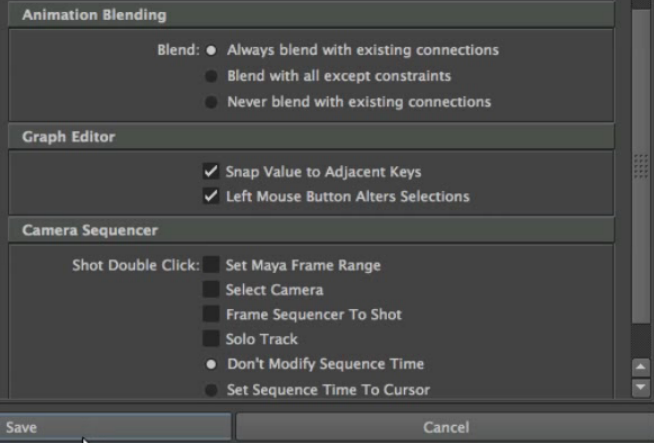
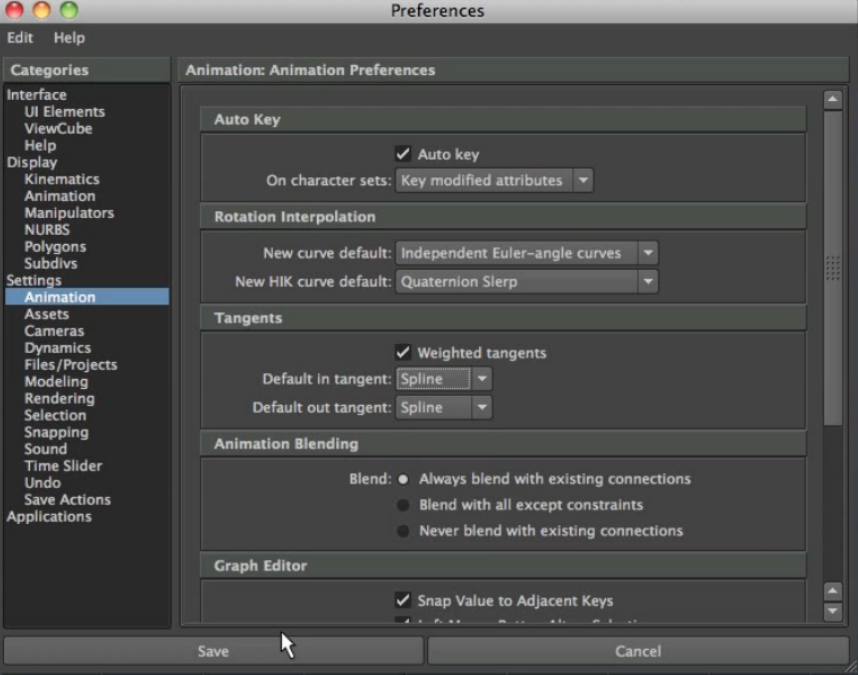
6. Scroll down and check Always blend with existing connections. Check both boxes in Graph Editor. Save
|
5. In Animation Settings in that same preference box, check the auto key box. On character sets - Key modified attributes. Tangents should be weighted and set to splines
| ||||

setting keys
|
1. Your first key will be set on frame one, move your ball up and key all. Think about how high the ball is on the first bounce
3. For the 2nd bounce, it shouldn't go so high and it won't take so long. Try frame 18, move the ball up and set
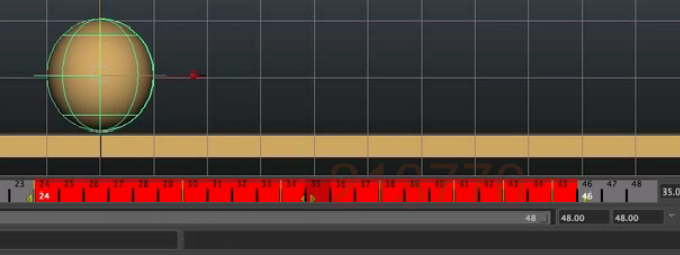
9. If there's a part that's too slow, you can change it in the time line by middle mouse button > hold shift and drag over an area. You can move those red selected frames.
|
2. Guess that your ball takes about half a second to fall so move to frame 10 and set the Translate Y to 0. Notice how your key has been automatically set.
4. Frame 25 to move the ball back down to translate Y = 0
5.3rd bounce. Frame 31 back up 6. Frame 35 back down 5. Make it bounce 5 times, smaller and smaller with each one and with less frames between each. 8. Do a play back to see how it looks! Can you see anything wrong right now? |
Editing F-curves to get more bounces
Learning Targets: - Insert more keys in graph editor to increase the number of bounces
- Use past knowledge to insert Slow-ins and slow-outs at the top and quick ins and outs at the bottom
- Work with partner to problem solve how to move the ball forward
- Analyze the movement and edit how far the ball travels
- Use past knowledge to insert Slow-ins and slow-outs at the top and quick ins and outs at the bottom
- Work with partner to problem solve how to move the ball forward
- Analyze the movement and edit how far the ball travels
|
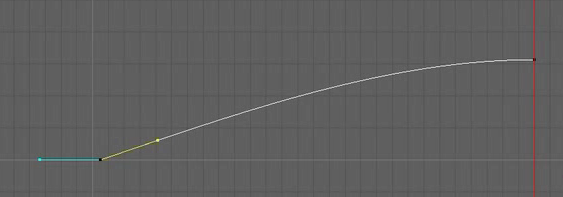
1. Open up our good old friend Graph Editor. On the translate Y curve you can really see whats going on. You can adjust the height of the curves by moving the points up and down.
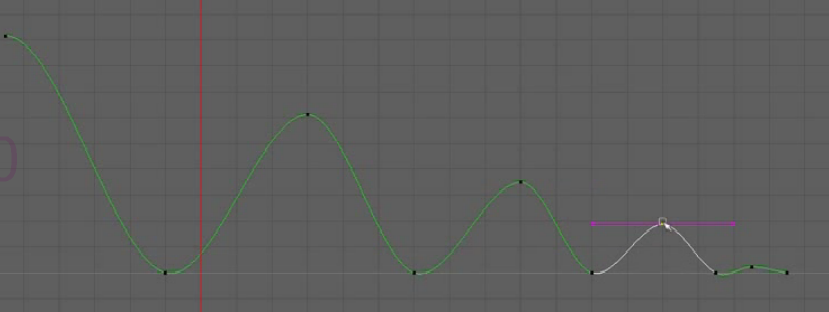
3. Insert more keys to make a small bounce
|
2. Let's add a few more bounces. Increase your shot length if you need more room. Right click > insert key middle mouse and select where towards the end of where you'd like to stop bouncing
|
Slow at the top and quick at the bottom
|
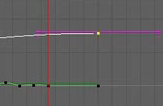
1. In graph editor view > show buffer line
2. Make sure all your tangents are straight 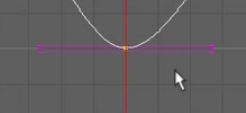
4. To refine further, we'll keep changing the spacing along the top. We can do this by adding another key
|
3. Break your tangent and change them to this shape

Looks pretty good now hey??!!
So now you have the ball hang longer in the air between bounces.
TIP: Keep checking your reference video to see how the ball really bounces |
bouncing the ball along
|
1. Move your view so ball is to the left hand side of your screen.
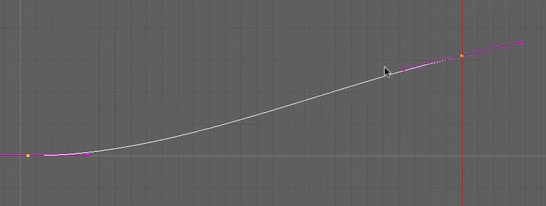
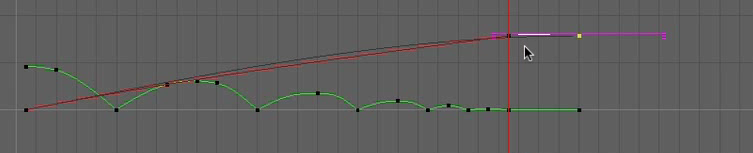
3. Look at the translate X in graph Editor and you see the curve. You see a slow in and a fast out. Not really what you want!
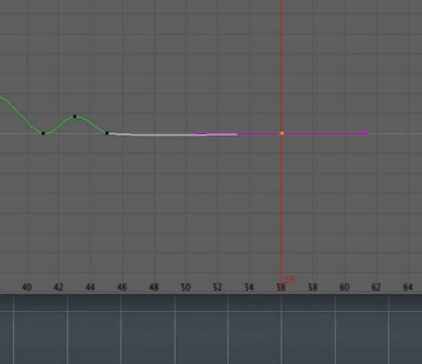
...to this. Now key selected in channel box. You will only duplicate that part
6. Does the ball look like it's traveling too far?
Use the Region tool to scale the X curve. 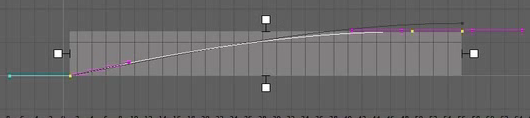
|
2. From frame 1 where your ball is up. Select the last frame you have set and move the along the frame to where you want it to finish
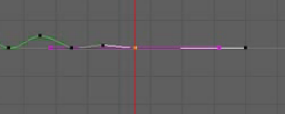
4. You need a quick in and a slow out. It should look like this
5. Now look at all curves, do they end in the same place? No? Then move the X curve end key back in line with the Y. So, from this....
TIP: Hit play to see the ball move and all the changes you make as regularly as possible
7. The ball feels like it's traveling too much?
Turn off the region tool. On the X translate, insert another key onto the frame where you think the bounce is too soon/late. The move it accordingly. 
|
working with two characters
Learning Target: - Add and Move an extra character so the the same action is repeated but a little later with in the shot
- Use the equation bar to edit how much movement in the second ball takes place
-Create layers with multiple characters
- Use the equation bar to edit how much movement in the second ball takes place
-Create layers with multiple characters
|
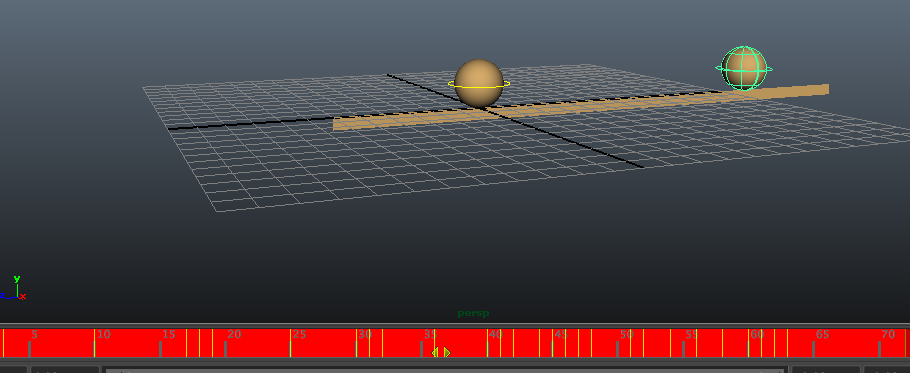
1. Start with your one animated ball and import the same file you started with over the top. View them in Perspective view.
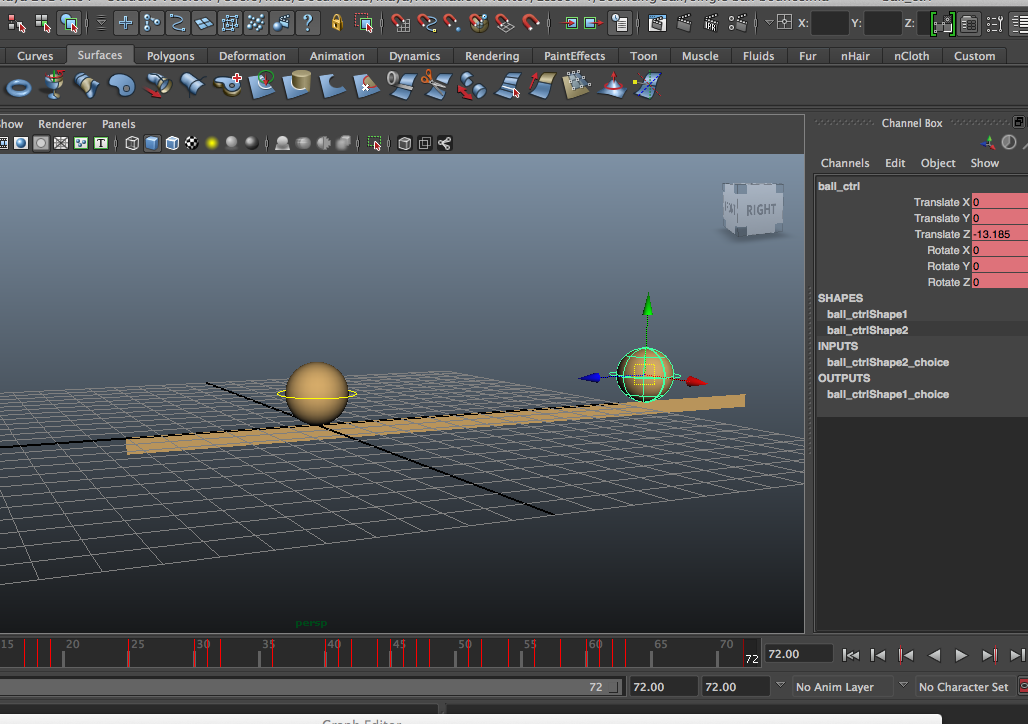
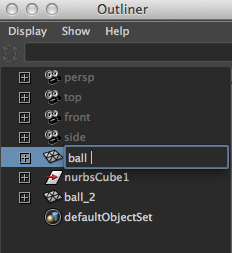
5. Open outline windows > Outliner and you'll see the two balls. Rename them to make your life easier!
8. Repeat the steps again for a third ball
|
3. We're going to copy the previous ball's animation onto the new one. So, select the previous ball and copy the timeline.
4. Select your new ball, click on the timeline on frame 1 and paste. When you're done, both balls should b in the same place so it will only look like one!
6. IN the graph editor, grab the z translate and move it , you'll see the ball move over.
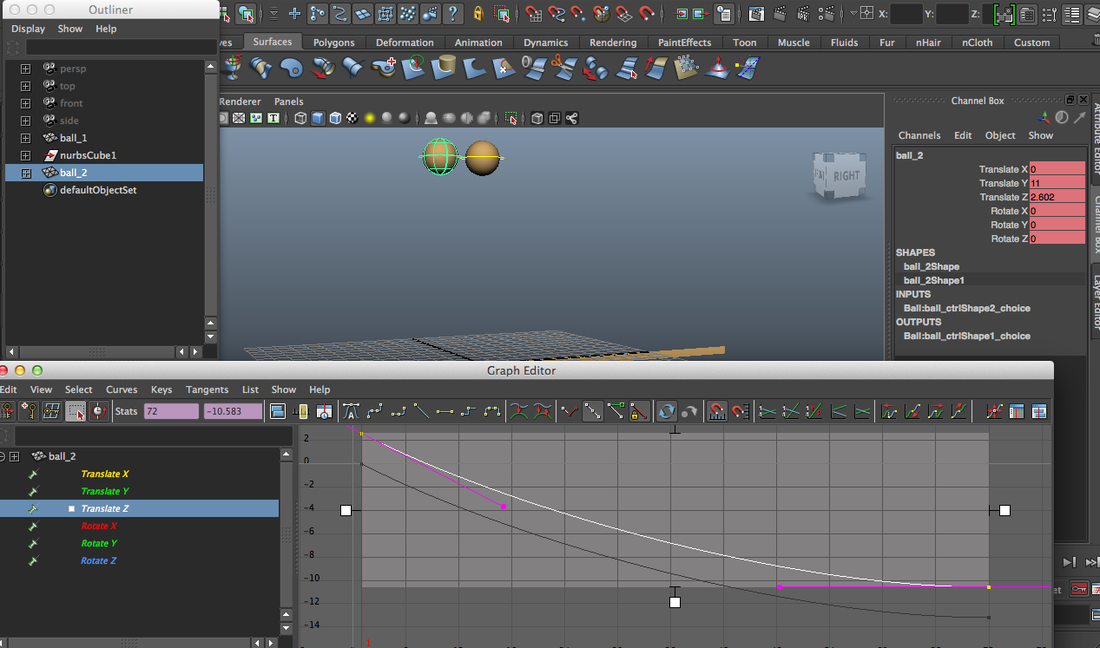
7. You can move the ball in translate X too
TIP: If you have a mac, you can drag the file into Maya from a folder or desktop. It's a bit quicker for you! |
off-setting the animation
Now you can make your balls bounce at different times
|
1. Use Ball 3 and copy the entire timeline. Then extend the shot length a little both end. -48 to 72 for example

5. Increase the height of ball 2 by entering equation:
+=2 
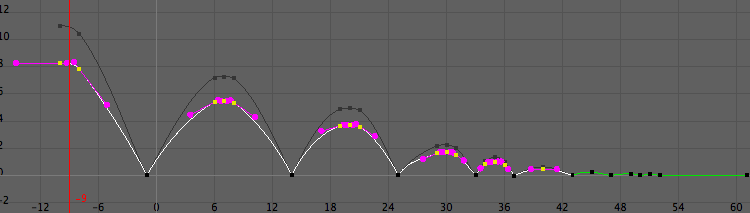
6. You can, of course, go back and edit your curve if they are too....angry at points.
* multiply - minus + adds |
2. Drag the whole thing down to begin at around -15
The paste and see how it looks. 
3. Now do the same with Ball two, shift it down 4 frames
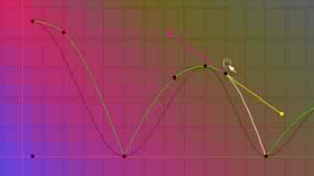
4. Next change the height your balls bounce. Select ball 3 and translate Y in the graph Editor. You see there are Stats Boxes. We're going to type *=.75 It means multiply the height by 75% 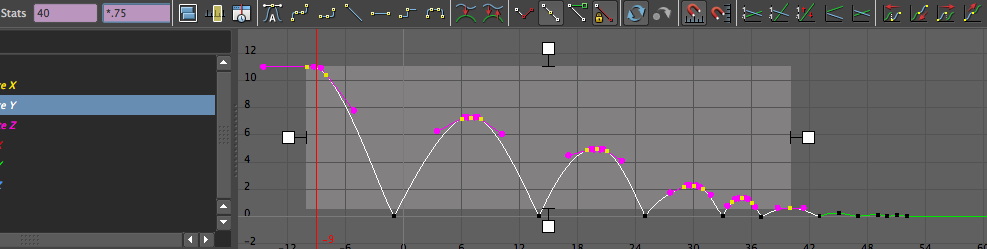
If you have the buffer curve on, you'll see the difference
|
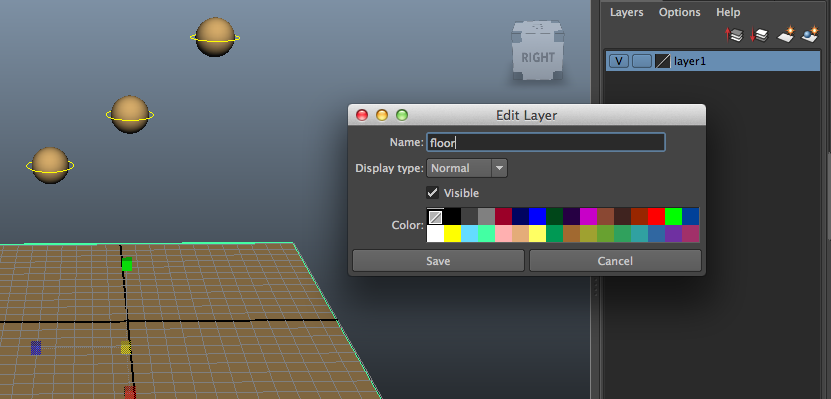
creating layers with multiple characters
1. Make a floor and then add new layer with the floor selected
|
2. Referencing - When you apply the R you will not only not be able to not select that object but your scene will become much lighter. This is a good habit as your computer becomes slower

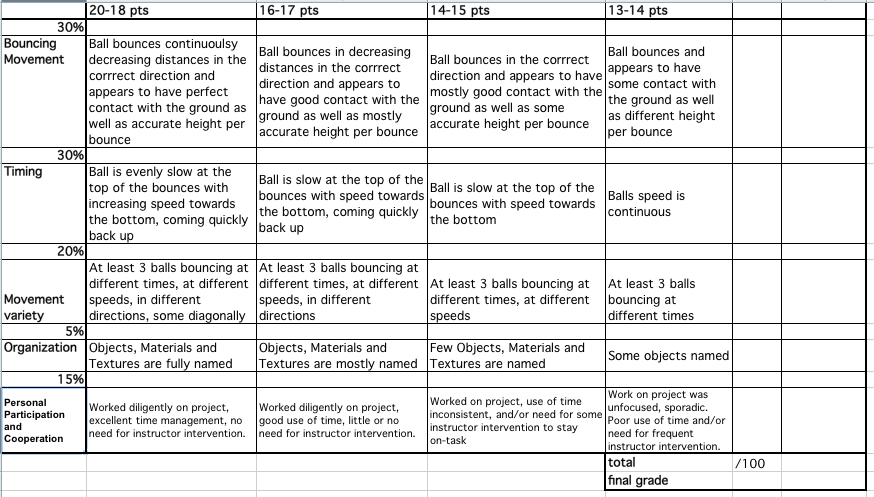
EXERCISE: This week, you will create a scene with two bouncing balls! Here’s the lowdown on how to get there.
|
3. You can do the same with the secondary characters
Primary character = The main character in the scene Secondary characters = The characters that are in the scene but of not great importance and we don't spend as much time on them. Put ball 2 and 3 in different layers 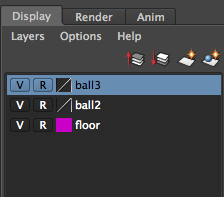
|