OVERVIEW: The goal this time is to give you the understanding and tools to animate a simple rig with interaction. By the end, you will have animated a robot arm, set up constraints to pick up an object and rigged your own simple character demonstrating your basic understanding of parenting and hierarchies.
get the feel for the rig
Learning Targets: - Discover how the pre-made robot arm moves
- Create shelves and make and edit buttons to speed up your working process
- Create shelves and make and edit buttons to speed up your working process
You can find all different types of pre-made rig on the internet and many are free to download. However for this exercise you should use this rig
|
Download your simple Robot Arm Rig here
You should always start at the base of a character and work out when animating or creating a pose. Notice how you have the layers already set up. Very useful!
R means you can't select the object but you can see it, it also means that your computer will run faster 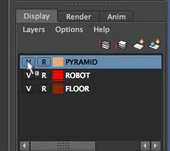
|
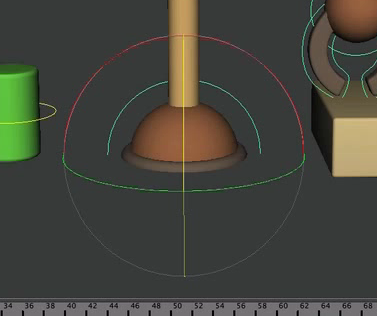
Open the Arm in Maya and start to play; how do you control the movement?
TIP: Do not use the yellow circle ‘E’ rotate now because all the details in the channel box will go crazy. It will be very difficult when it come to use the channel box. Make sure you only change one axis at a time with the other circles.
| ||
Creating Shelves AND MEL BUTTONS
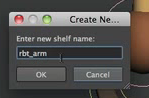
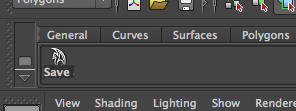
1. Let’s create some tools to make your work flow easier. Look at the shelves at the top of the screen, see the arrow on the left click on the arrow > create new shelf and call it ‘Robot Arm’ after your character
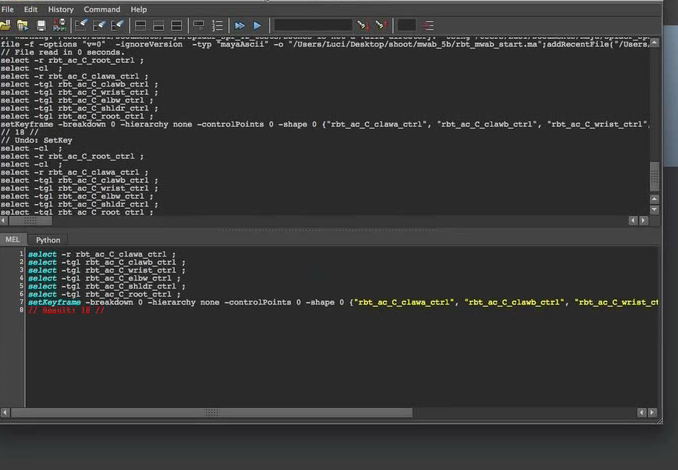
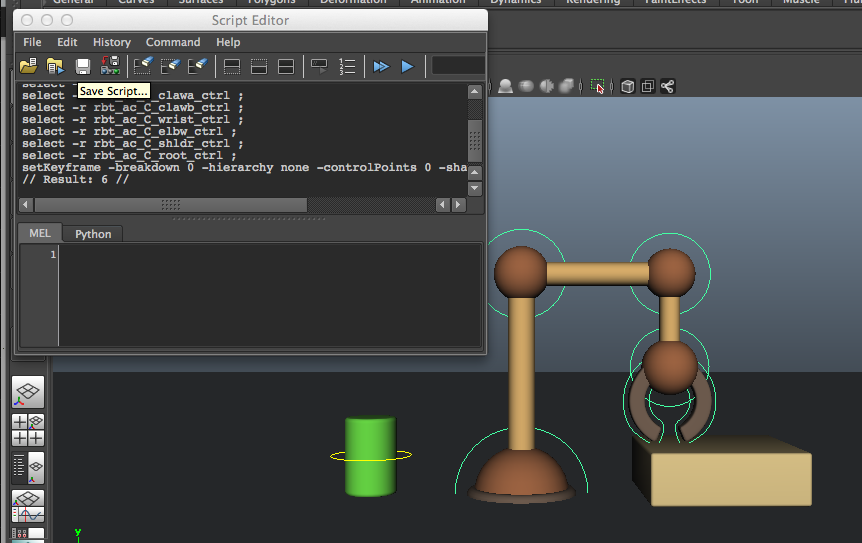
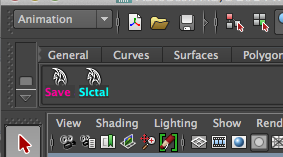
2. To set keys, normally we’d have to select all of the different parts and then set, well we’re going to create a button, that does that and makes things quicker. Let’s look at the script editor in bottom right of screen

Open it up and you’ll see the code for all the actions and information about the scene.
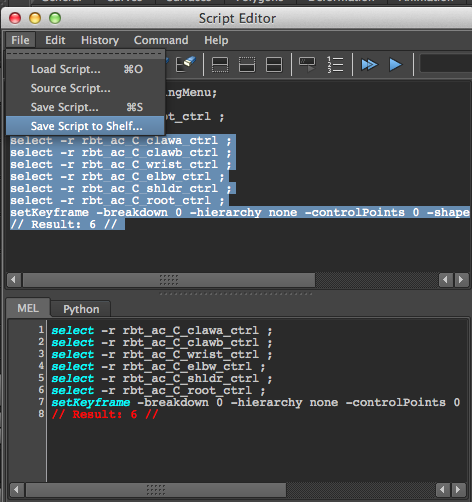
5. Now copy and paste these actions into the lower box of the script editor. Then file > save script to shelf. Name the shelf ‘save all’
|

Now you have an empty shelf
3. Now press clear all
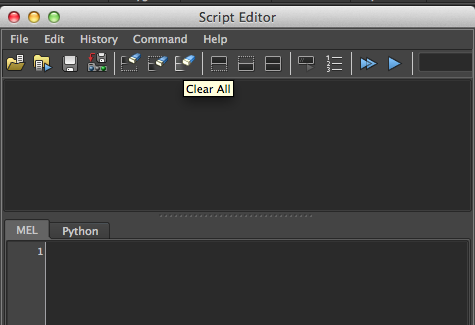
4. Make sure everything is deselected first and then go back and reselect backwards towards the central part of the arm. Then press ‘s’ save. See all the script record your actions
6. See a button has appeared. You press this whenever you select a key and it will save everything.
|
edit a button
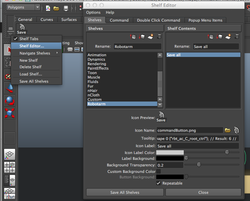
1. Go back up to the arrow on the top left > Edit shelf and this window will appear
|
This is very useful to rename buttons, rename selves (you can make a shelf for a specific assignment). You can also change the color of the button and have button you use all the time in bright colors. All good trick for making your workflow QUICKER
|
What to look for in a reference
Learning Targets: - Find and know how to use reference
- Write down what to look for within a reference
- Summarize what is appeal and find an example
- Write down what to look for within a reference
- Summarize what is appeal and find an example
Watch this video, see how the robots move, look at their joints. What do you notice?
Why is it good to watch the real thing?
With this into consideration, you should not copy what you see exactly, rather use it as a reference to see how things move.
If you copy it’s called Rotoscoping not Character Animation
With this into consideration, you should not copy what you see exactly, rather use it as a reference to see how things move.
If you copy it’s called Rotoscoping not Character Animation
appeal!!!
|
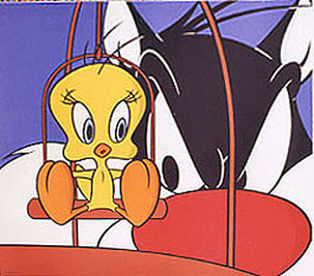
What is appeal?
NOT Fuzzy bunnies and kittens! - what stands out in an animation - what is special about the main character - the style of the set - About the bad guy and what makes us feel for him It makes you involved in the movie! What is the appeal about the movie we watch? The jiggles Blocking When you break up your movement into different parts |
|
Learning Targets: - Animate the robot arm to pick up the can using blocking method
blocking: when you break up your movement into different parts
It’s time to make your robot move
Learning Targets: – Make it pick up the can and move it onto the platform.
- Add Appeal to the animation
-Use blocked timings and copied pairs
Learning Targets: – Make it pick up the can and move it onto the platform.
- Add Appeal to the animation
-Use blocked timings and copied pairs
|
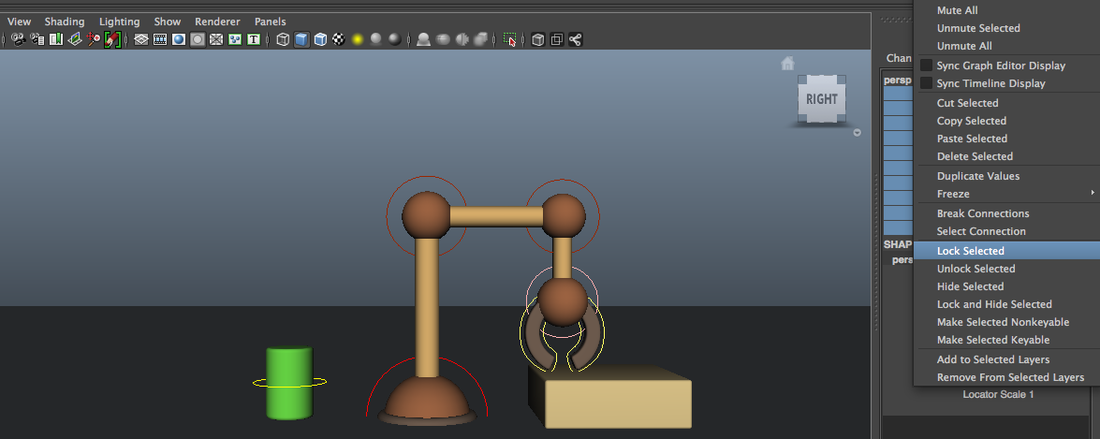
1. A really important thing to check before you start animating is to look at where the camera is. You’ll need to lock it down to stop it from accidentally moving around. View > select camera. The select all the channels in the channel box > right click > lock selected.
|
|
|
3. Now begin to set your keys and move your robot arm into different positions. Do not worry about where in the time line you put the keys, we’ll move that later. Bring your arm over the can and clamp it.
TIP: Try to Complete your movements with as little keys as possible, at this stage, you want to keep thing simple 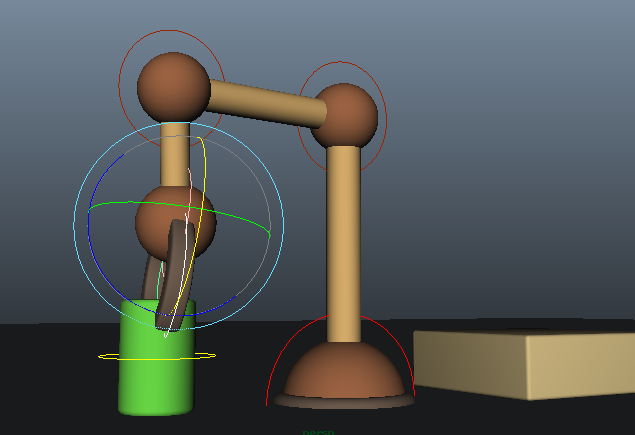
|
2. Create a button in your shelf that will select all you want to move.
4. Imagine that you have clamped the can and then move the arm back to the platform and drop it down. You don't actually need to move the can yet. There's a trick for that coming up....
|
setting up for more appeal in the timings
When you put timing in, you put in the LIFE, you make things seem REAL
|
Now you’ll need to work out the time between key frames
1. Animation Preference > Animation > Default in Tangent = flat > Default out Tangent = stepped 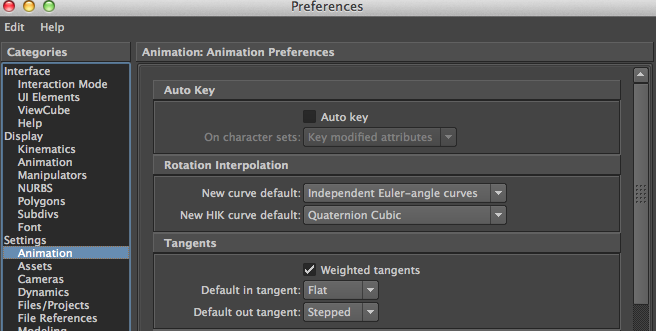
|
2. Select all and open graph editor. ‘f’ to frame and the select everything
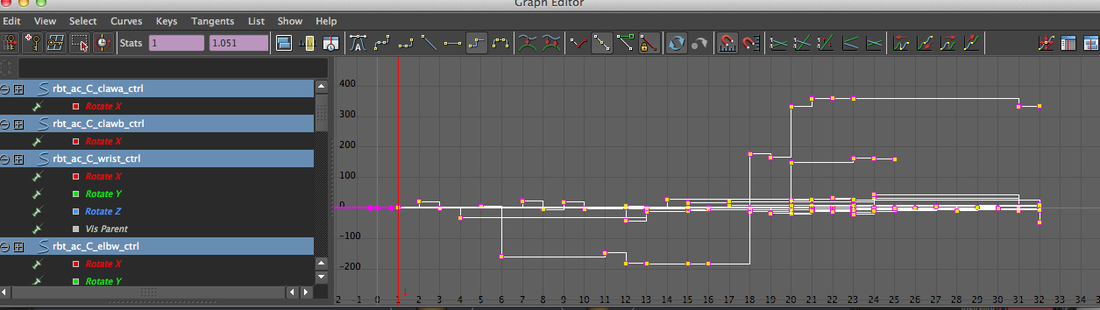
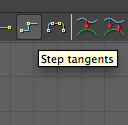
3. Select Stepped tangents
|
blocked timings and copied pairs
|
1. Select all including the can
2. Hold Shift + middle mouse button click to select all the keys in the slide 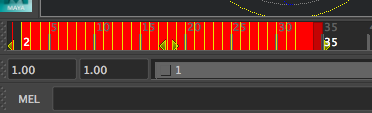
5. Now we can repeat these steps for the rest of the movements and insert pauses where we need. Move up all the frames to where you want the next to start and copy and past the previous if you need.
Tip: Press play regularly to see the timing, you’ll to imagine the object making the movement in between right now. Also do some play blast to see. Play play play to see. |
3. With middle mouse button you can drag that up the timeline accordingly. Remember 24 frames a second.

4. To have a pause before your robot starts we’re going to copy and paste frame one before the next frame.
|
touching up
|
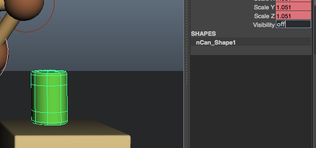
1. Select your can and turn off the visibility in the channel box
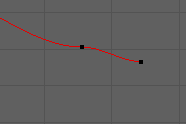
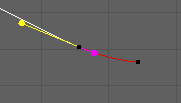
4. Go through each curve at a time and do some cleaning on your tangents, as shown before
|
2. Select all the controls on robot arm and open up graph editor
3. Select everything and convert to Flat tangents 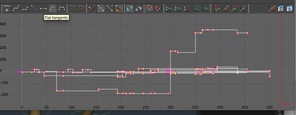
5. Play it through and make changes as you need to
|
intro to constraints
Learning targets: - Use constraints to pick up the can and move it with the hand to place on the platform
See how your can is still blocking from place to place. Let’s address that!
|
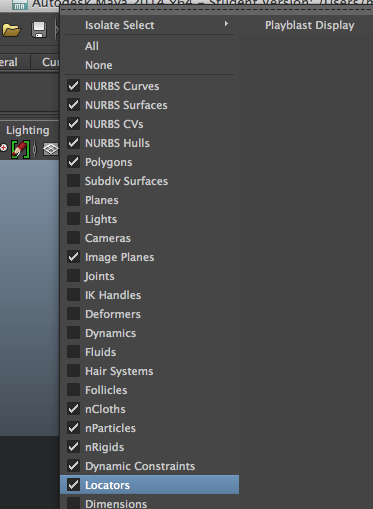
1. Go to View > locators make sure it is ticked
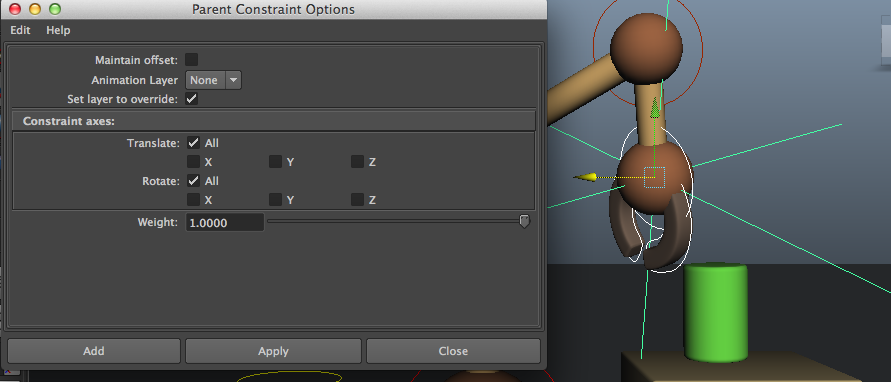
5. next constrain the can to the locator. Select locator first SHIFT HOLD the select can. Then go to constrain options>tick maintain offset
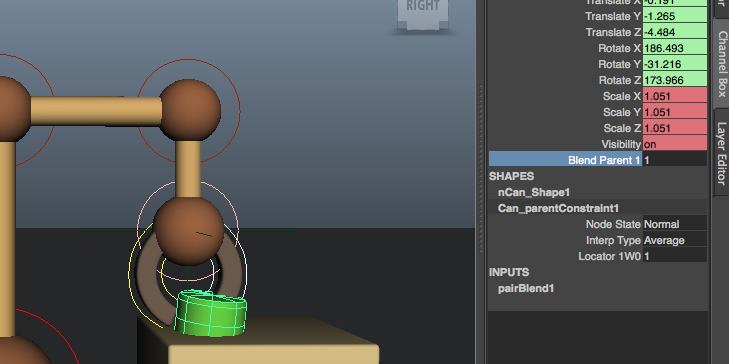
7. Make sure it's just the can selected. On frame one, turn 'blend parent' to '0' (this means off). Select all transformation and 'key all'.
8. Move to the frame where the robot grabs the can and turn blend parent to '1' (this means on) and repeat to turn it off. 9. Now you'll need to off the visibility at the end because it jumps back to it's staring position. DOn't forget to key all. 10. next duplicate the can where it disappears. name the 2nd can and turn off it's visibility at the start and on when the 1st can disappears. You are free to animate the 2nd can to land on the platform. |
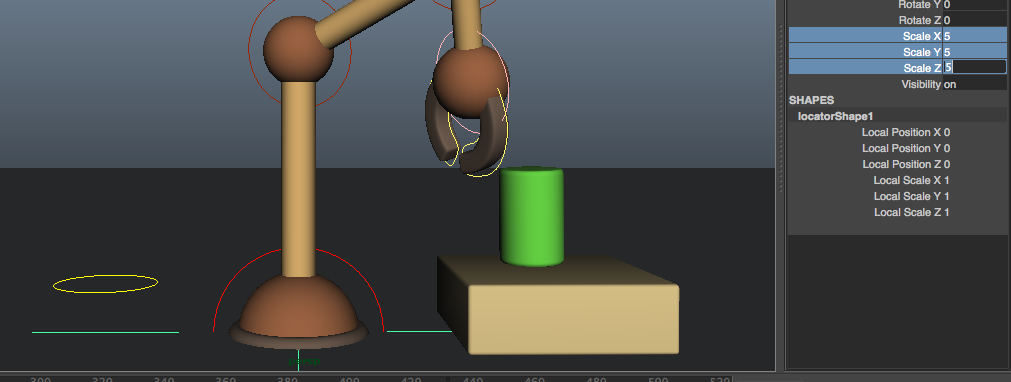
2. Create > Locator. It will appear under your arm so scale it up in the Channel Box to see it.
3. When creating constraints it’s important which order you select things in. Your can will be attached to the wrist of your arm. In this case the constrainor will be the wrist so select it hold Shift then select the constrainee (the locator).
4. Constrain > open parents option. Turn off maintain Offset. Then click add. See you locator jump to between the can and wrist? 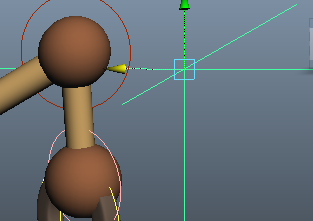
6. IN the channel box you can choose when you want to have the can attached scene by scene. Select the can only. Then select all the channels in the channel box, and key all. The top part should turn green and the bottom red.
|
EXERCISE: For this session, create BLOCKING of the Robot Arm to have it turn to the can, pick up the can, then turn back to the box and set the can down using constraints..
- Use the model provided and Do not exceed 300 frames.
- Create a .ZIP archive that contains: Name the Maya file “YourFullName_RobotArm1.ma”.
- Submit your work in the relevant Google drive folder
- Use the model provided and Do not exceed 300 frames.

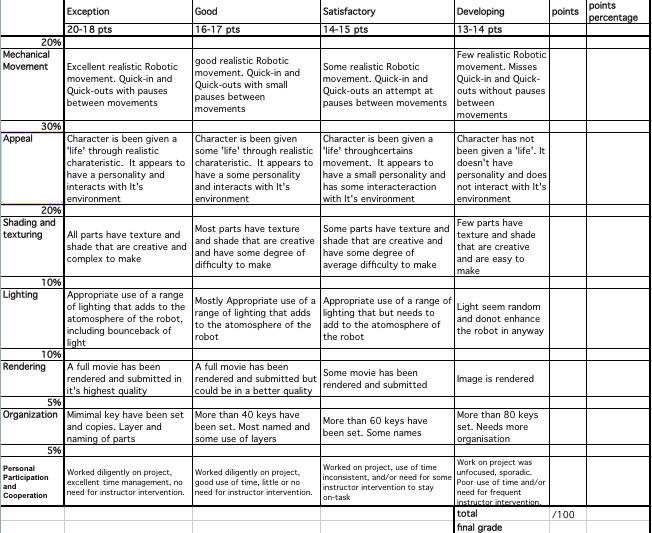
Exercise: Submit your robot after animating him/her. Give them 'lives', a character, appeal. Make them interact with their environment. Add textures and shaders, lighting and then render the full movie.
make a Zip File that contains your Maya (.ma) document and the full rendered .mp4 movie file.
make a Zip File that contains your Maya (.ma) document and the full rendered .mp4 movie file.