Learning targets:
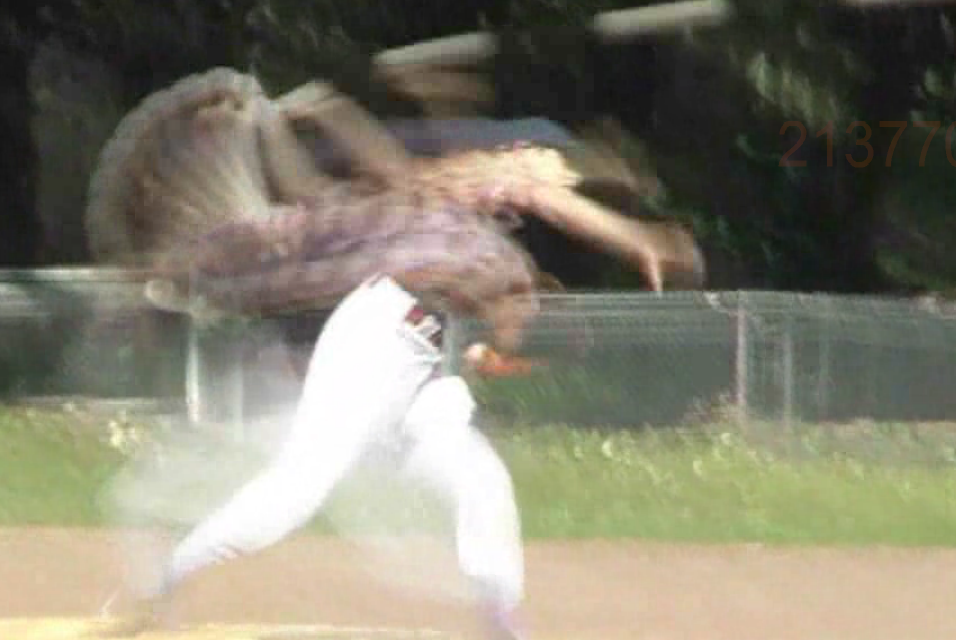
- Identify Arcs in photographs where movement is taking place
- Demonstrate where the arc would be in your own movement
- Move a rig smoothly between 4 points on your path of action
- Evaluate what is successful and any pitfalls suggesting ways to problem solve
- Clean Tangents to create a much smoother circular arc
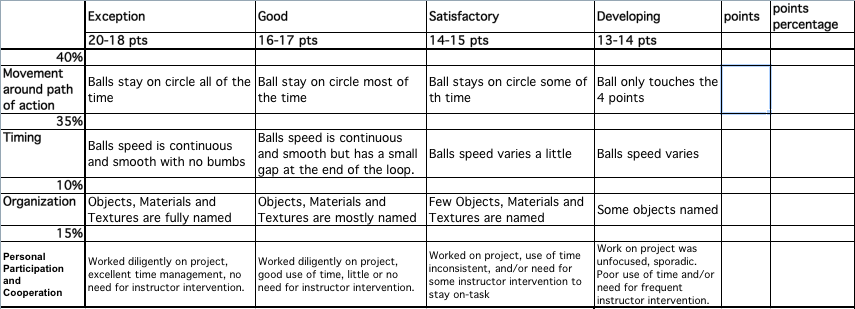
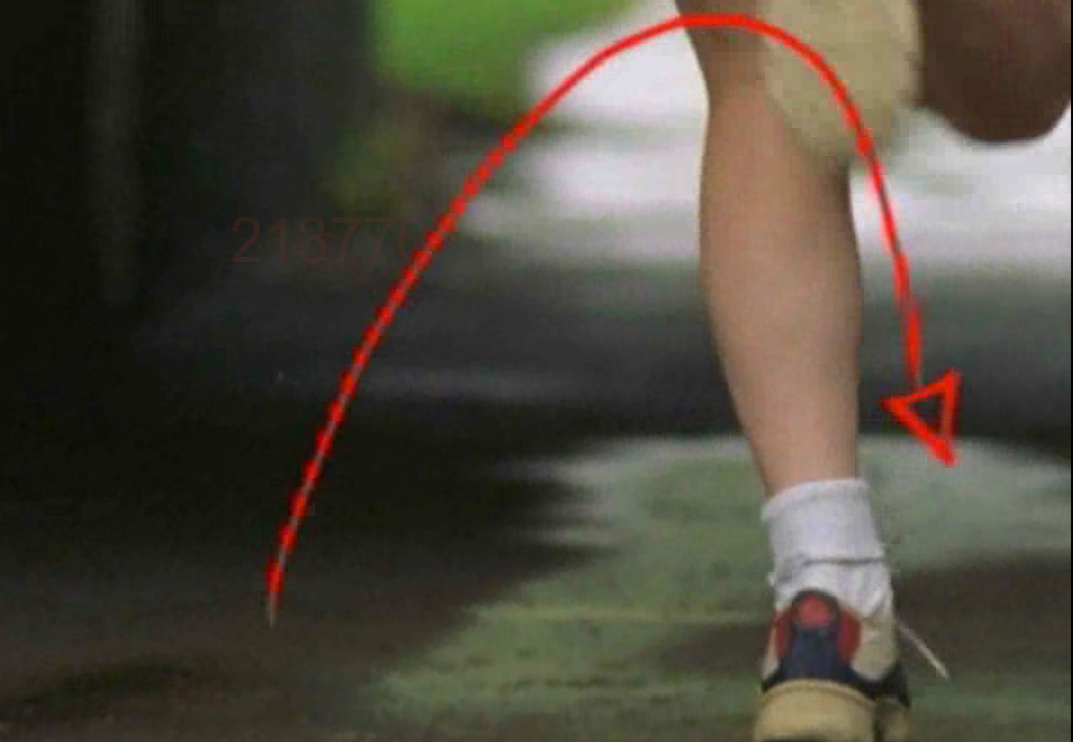
Animation principle: path of Action/arcs
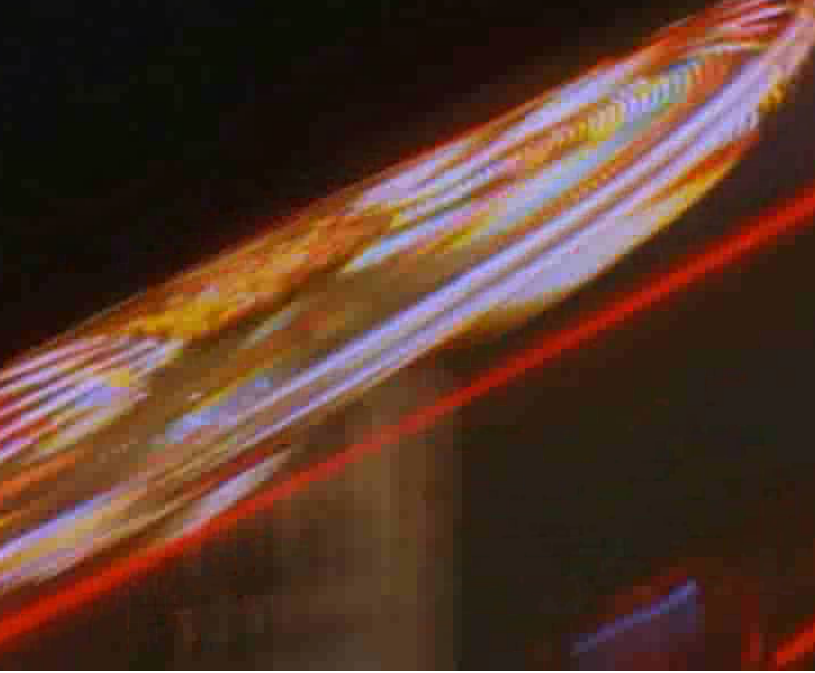
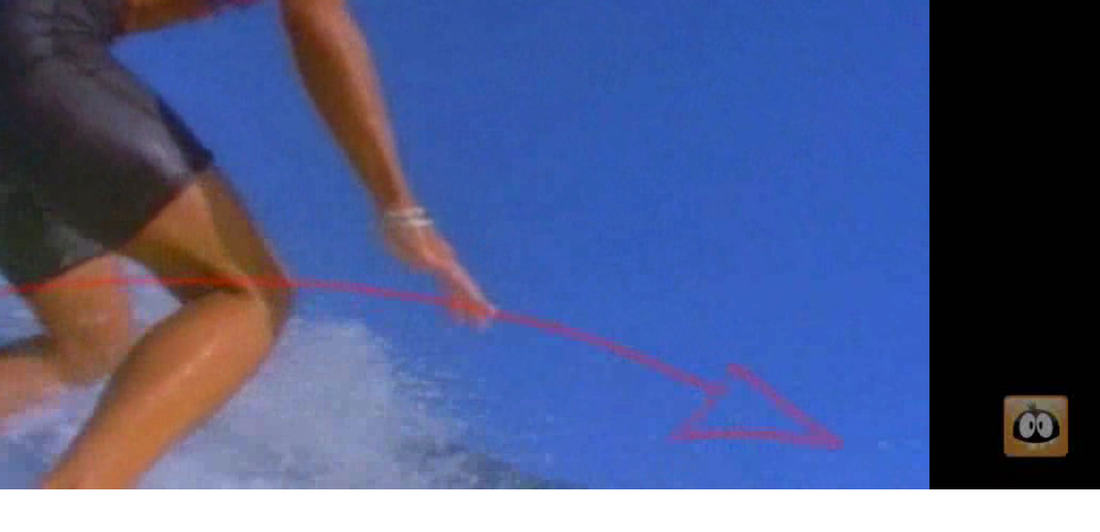
Path of Action = Arcs
Are everywhere!!
And will be very important in your animations from now on!
Are everywhere!!
And will be very important in your animations from now on!
animating a circling ball
|
Here you'll see how to make your ball roll around in a circle.
You can down load this file, unzip it and open it up in Maya to begin... |
| ||
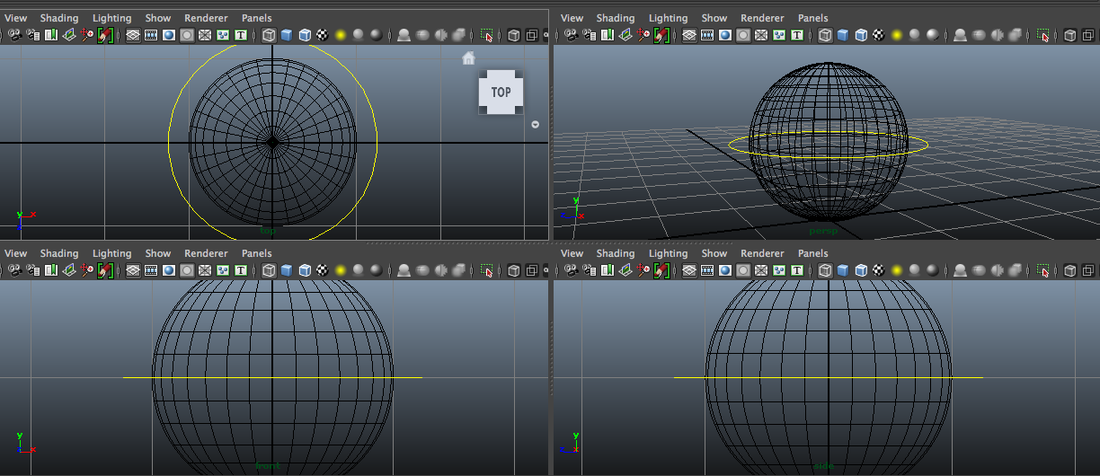
beginning the shot
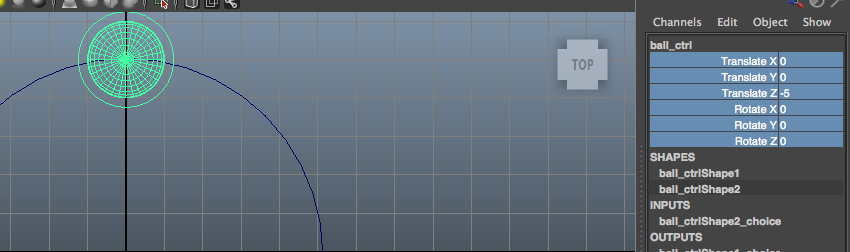
This ball is NOT a primitive, it is a RIG! A rig is a skeleton structure full of controllers in order for the animator (you) to best control every action. Notice there's a ring around the sphere.
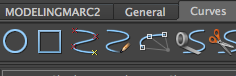
1. In that top tool bar, there's a drop down menu and we can select all objects off. Now you can't select anything.
1. In that top tool bar, there's a drop down menu and we can select all objects off. Now you can't select anything.
|
Drop down menu is the tool to the right in this picture

However, set it back to select all objects for now.
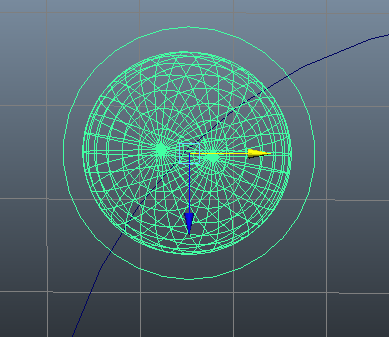
3. What we are trying to do is set a path of action. The easiest view is top view because we only want to travel along two axis
set keys
7. Put keys on the 4 points on the circle at 12 o'clock, 3 o'clock, 6 o'clock and 9 o'clock. Put your timeline in frame 1. Select the curve controller and move the circle up to 12 o'clock and the set the key.
We're making a cycle
Cycle = a movement that begins and ends in the same place iron out glitches
9. A problem that we are encountering is that there is a glitch at the beginning end. That's because at frame 0 and 96 the sphere is in the same place. Every other frame it's in a different place.
You can fix this by starting the movement on frame. Pull the grey bar in time line 
copy and paste
11. Select X only and copy
13. Next select your pre-infinity and post infinity curves. Do not choose the ones with off-set.

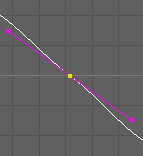
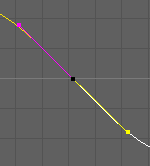
15. Go round and move your tangents to follow the curve
17. On z axis and copy the first 96 frame
19. Make sure you are on key -96.
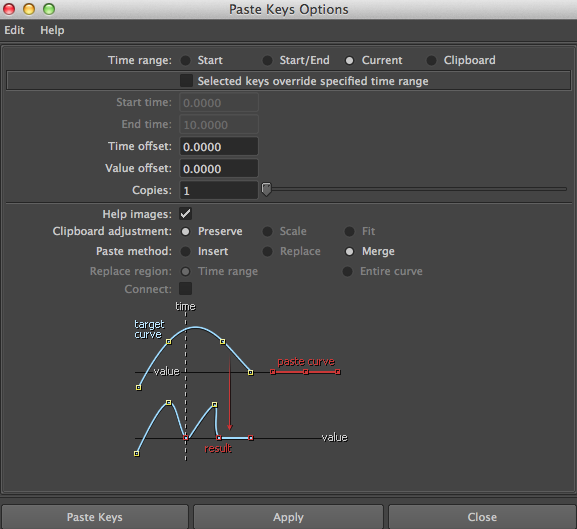
Now open up paste preferences again. Check HELP IMAGES - It will help you! Check Merge - helps us preserve the first key. Now your circle should be going around twice. |
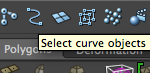
2. Now select select curve objects and you'll only be able to move what you want to animate
4. Next you can define the shot length - 100 is good!
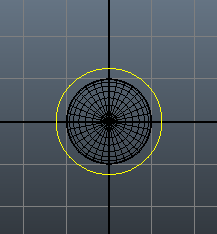
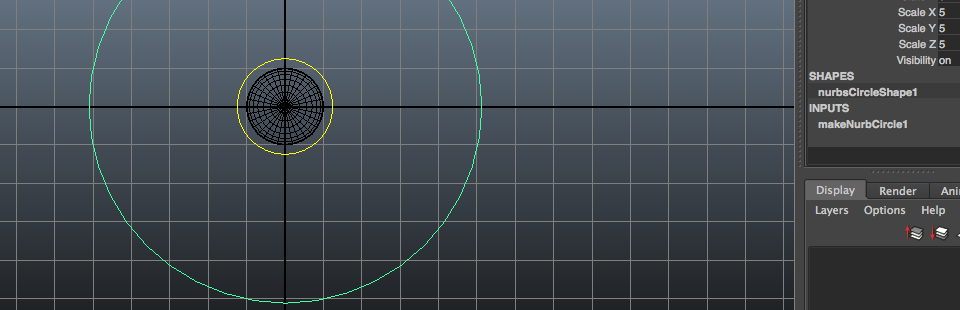
And your frames can be 96 - 4 spare 5. Now we can draw the Path of Action. There are many ways and this is one. Select the Nurbs Circle from Curves menu.
6. Draw the circle directly over the sphere and change the scale in the channel box to 5.
8. Move to frame 24 and repeat for 9 o'clock
Move to frame 48 and repeat for 6 o'clock move to frame 72 and repeat for 3 o'clock Copy and past the first frame into 96 and set The movement is close but it's not circling
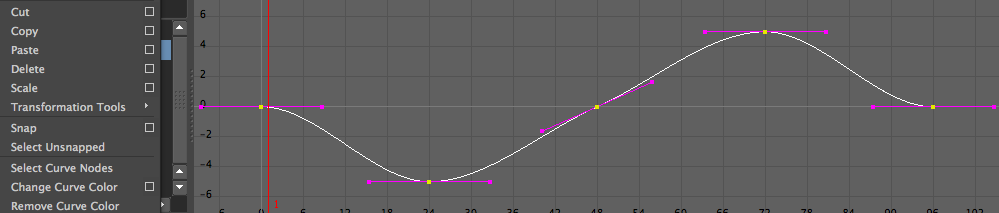
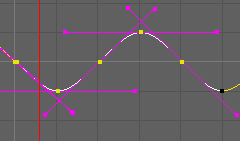
10. next up let's pull up Graph Editor and select only the X and Z Axis and 'F' Frame in on them.
These curves need to look the same. 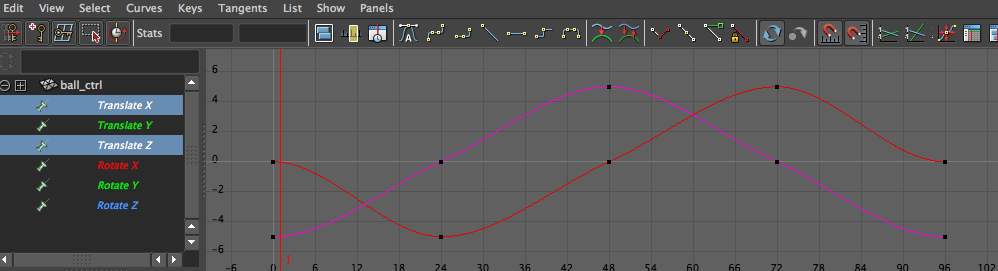
12. Make sure you are on key 96. Paste it. But before you paste you need to make sure that connect box is deselected. You don't want it to continue, only repeat
cleaning up
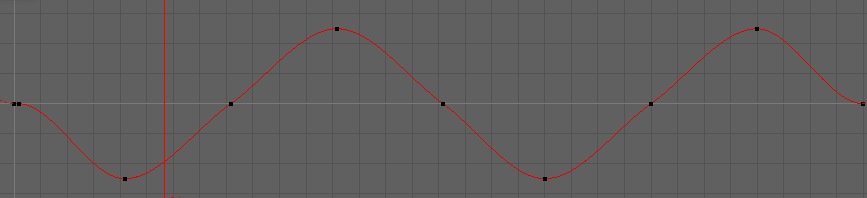
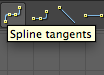
14. Finally clean that up by clicking Spline Tangents
You'll have a much smoother circle!
16. Now you have to do the same for the Z axis.
18. Change your shot to start before 0
|
Learning Targets: - Analyze and understand where and how to refine the circle
refining the path of action: insert a break down
|
20. So now you see how one of the paste options works. Make your shot 1 - 96 again and take a look how it goes..
We still need to refine the Path of Action!! See how the path looses the circle about halfway between keys? 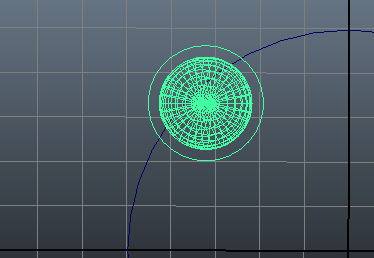
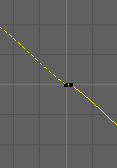
22. AH HA! This is looking really good now. Refining time in the Graph Editor. Focus on the X translate to start. Clean up your tangents again!
|
21. So move in, on key 12 (half way) to sit directly on the circle and set a key. Do this at the 4 stages. This is called inserting a break down
23. Do some cleaning in the Z translate. Here's another trick: You can select all the top tangents an the flatten tangents button.

|
EXERCISE: Do some experimentation, make the ball speed up, play that region tool, you could set even more keys to make it follow the circle even better. Spend another 15 minutes and explain what you did and how you did it!
Save the file 'nickname_circlingball'
Save the file 'nickname_circlingball'